Quantcast
Channel: Embedded – Qt Blog
Viewing all 111 articles
Browse latest View live

Fast-Booting Qt Devices, Part 2: Optimizing Qt Application

$
0
0

Welcome back to the fast-boot blog post series! Last week we covered the fast-boot demo that showed you a video of an i.MX6 board booting under 2 seconds. In this blog post we will cover how the Qt QML cluster application was optimized.

The original demo shown in Qt World Summit 2015 was designed in PC environment and the startup time was not addressed with the initial design. Design already incorporated usage of Loaders so that some parts of the UI were asynchronously loaded but the startup sequence was not thought at all. So, to begin the optimization for the startup we first needed to think of the use case: What is it that we want the user to see first? We selected that the first thing the user must see is the frame of the cluster after which we load and animate the rest of the objects to the screen.

In the cluster image below the red overlay marks the parts we decided that user must see when the application starts:

mask_layer_red

When looking at the application code we noticed that our dashboard was actually combination of multiple different mask images and some of these were fullscreen. So we combined all the visible parts into one single full screen image that gets loaded on top of the UI:

DashboardFrameSport-mask


To make the startup of the application as fast as possible we adjusted the internal design of the application as well. We separated the dashboard frame into it’s own QML file that gets loaded as a very first item. After cluster frame is loaded and drawn we enable the loader underneath to load rest of the UI.

frame_qml2

We also used the QML profiler in Qt Creator to find out what was taking time. Initially the demo used the original Qt Quick Controls that were designed for desktop. This caused the creation of these gauges take some extra time (note that, Qt Quick Controls are being redesigned for embedded use cases for Qt 5.7!) To solve this part for now, we replaced the gauges with images and created a fragment shader to color the parts of gauges that needs animation.

As a final touch we added the flip animation to gauges and fade in to the car to make startup feel more natural:

After these optimizations we got the Qt application to show the first frame under 300 milliseconds on the target device (from the time operating system kernel is loaded).

Optimizing Your Application: ‘Do’s and ‘Do not’s!

Finally, based on our experience, here is a summary of tips’n’tricks for optimizing your Qt Quick applications. In case you feel like you could use additional help, feel free to contact us or any of our Qt Partners and we’re happy to help you with your application!

Do:

  • Design your application to start fast from the beginning. Think what is it that you want the user to see first.
  • Make startup animations to allow parallel loading.
  • Use chain loading. Run only as many loaders as you have cores in your CPU (e.g two cores: two loaders running at the same time).
  • First loader should not be asynchronous. Trigger the rest of the loaders.
  • Create QML plugins that are loaded when required.
  • Connect to back-end services only when required.
  • Let the QML plugins start up non-critical services and close those down when not required anymore.
  • Optimize your png / jpg images.
  • Optimize your 3d models by reducing the amount of vertices and removing parts that are not visible.
  • Optimise the 3D model loading by using glTF.
  • Use Qt Quick Controls 2.0. These are designed for embedded use and the creation times are a lot better than in Quick Controls 1.0 for embedded use cases.
  • Limit the usage of clip & opacity.
  • Measure GPU limitations and take those into account when designing the UI.
  • Use Qt Quick Compiler to pre-compile the QML files.
  • Investigate if static linking is possible for your architecture.
  • Strive for declarative bindings instead of imperative signal handlers.
  • Keep property bindings simple. In general, keep QML code simple, fun and readable. Good performance follows.
  • When targeting multiple platforms and form factors, use file selectors instead of loaders and dynamic component instantiation. Don’t be shy to “duplicate” simple QML code and use file selectors to load tailored versions.

Do not:

  • Go overboard with QML. Even if you use QML, you don’t need to do absolutely everything in QML.
  • Initialize everything in your main.cpp.
  • Create big singletons that contain all the require interfaces.
  • Create complex delegates for Listviews.
  • Use Qt Quick Controls 1.0 for embedded.
  • Clip should be avoided altogether if possible. (98% of the use cases this should be possible).
  • Fall into the common trap of overusing Loaders. Loader is great for lazy-loading larger things like application pages, but introduces too much overhead for loading simple things. It’s not black magic that speeds up anything and everything. It’s an extra item with an extra QML context.
  • Overdo re-use. Maximum code re-use often leads to more bindings, more complexity, and less performance.

In the next part of the series, we will look more closely into the operating system side of the startup optimization. Stay tuned!

The post Fast-Booting Qt Devices, Part 2: Optimizing Qt Application appeared first on Qt Blog.


Qt @ NXP FTF 2016

$
0
0
The Qt Company is a Silver Sponsor with Adeneo Embedded at NXP FTF Technology Forum 2016 where inspiration, training, ecosystem and expertise you need will be provided to boldly face the challenges and opportunities from new markets and ever-changing technologies. 
 
NXP FTF Technology Forum 2016
May 16-19, 2016
JW Hotel, Austin
 
The Qt Company, Adeneo Embedded & Toradex in our technical talks during the show: 
 
Technical Talks:
 
“Performance Driven GUI Development on Low-Cost Hardware” – provided by The Qt Company on Monday, May 16 at 3:15 PM, 205 – Level 2
 
Learn how Qt for Device Creation may be used to create advanced user interfaces in a few simple steps. Qt is a cross-platform C++ framework that offers tools to create modern and fluid user experiences. The Qt framework may utilize the OpenGL ES capable i.MX6 or perform simplified rendering for the new i.MX7. We will take a look at Qt and use Qt for Device Creation to develop a GUI application optimized for projects requiring low power and real-time tasks which are suitable for wide-range of industrial applications, while keeping advanced security features to be used in IoT applications—all with confidence and convenience. Attendees will discover how easily it is to enable a low power device with performant GUI effects. This evolution requires virtually no changes to the software or hardware — made possible by the Qt Framework and standardized pin-compatible computer modules from Toradex.

“A Detailed Look on the Heterogeneous i.MX7 Architecture” – provided by Adeneo Embedded on Monday, May 16 at 3:15 PM, Griffin Hall 4 – Level 2
 
This presentation will demonstrate the capabilities of the new i.MX7 System-on-Chip, a hybrid solution containing a Cortex A7 processor and a Cortex M4 processor. Particular attention will be given to the hardware modules and software counterparts allowing both cores to communicate with each other. This hybrid architecture will be highlighted through various potential use cases/product scenarios and a Qt powered application running on top of Linux along with FreeRTOS will be showcased, focusing on asymmetric processing.

 “A Balancing Robot Leveraging the Heterogeneous Asymmetric Architecture of i.MX 7 with FreeRTOS & Qt” – provided by Toradex on Monday, May 16 at 2:00 PM, Lone Star Ballroom C – Level 3
 
This technical lecture presents how Toradex built a balancing robot demo application using the new i.MX 7’s heterogeneous asymmetric architecture. i.MX 7 features a secondary Cortex-M4, which can be used for real-time or low-power applications. We will discuss how to make use of the secondary core with a FreeRTOS based firmware implementing the closed loop controller to keep the robot balanced upright. On the powerful main CPU complex, a dual Cortex-A7, Linux is running a Qt based user interface. We will go into details about the rpmsg/OpenAMP based messaging offerings provided by NXP. The robot demo application makes use of rpmsg to communicate between the two independently running processor cores and operating systems.
 
Please Contact us if you’re in Austin during this time or have any comments. 
See you in Austin!

The post Qt @ NXP FTF 2016 appeared first on Qt Blog.

Fast-Booting Qt Devices, Part 3: Optimizing System Image

$
0
0

It is now time for the third part of the fast-boot blog post series. In the first post we showed a cluster demo booting in 1.56 seconds, in the second post we opened up how the Qt application was optimized. Here, we will concentrate on the optimization of boot loader and kernel for NXP i.MX6 SABRE development board which was used in the demo.

Before even starting the boot time optimization I measured the unoptimized boot time which was a whopping 22.8 seconds. After measuring we set our goal to get boot time under 2 seconds. Now that the goal was set. I started the optimization from the most obvious place: root-fs. Our existing root-fs contained a lot of stuff that was not required for the startup demo. I stripped down the whole root-fs from 500 MB to 24 MB. I used buildroot to create a bare minimal root-fs for our device and a cross-compile tool chain.

After switching to the smaller root-fs, I did a new measurement of the startup time which was now 15.6 seconds. From this 15.6 seconds kernel, startup took around 6 seconds, the U-Boot bootloader and the unmodified application the rest. Next, I concentrated to the kernel. As I already knew the functionality required by the application, I could easily strip down the kernel from 5.5 MB to 1.6 MB by removing nearly everything that was not required. This got the boot time to 9.26 seconds out of which the kernel startup was taking 1.9 seconds.

At this point we still had not touched the u-boot at all, meaning it had the default 1 second wait time and integrity check of the kernel in place. So U-Boot was next obvious target. Inside U-Boot there is special framework called secondary program loader which is capable of booting another U-Boot or specially configured kernel. I enabled the SPL mode and modified my kernel to include command line arguments and appended my device tree to the kernel. I also stripped down the device tree from 47 KB to 14 KB and disabled console. Boot time was dropped to 3.42 seconds where kernel was taking 0.61 seconds and U-Boot + application rest.

Now that the basic system (u-boot and kernel) was booting already in a decent time, I optimized our cluster application. Start up of the application was changed to load the cluster frame first and then animate in gauges and last the 3D car model as described in our previous post. Boot time was still quite far away from the 2 second target so I did more detailed analysis of the system. I was using class 4 SD card which I changed to class 10 card.

My Qt libraries were still shared libraries so I compiled Qt as static libraries and recompiled our cluster demo using the static version of Qt. This also allowed me to remove the shared libraries from the root-fs. Using static linking makes startup of application faster since operating system do not need to solve symbols of dynamic libraries. With static linking I was able to get the cluster application into one binary with size of 19 MB.  This includes all the assets (3D model, images, fonts) and all the Qt libraries required by the demo.  I actually forgot to use the proper optimization flags for my Qt build so I set optimization for size and removed fpic as a result executable size was reduced to 15 MB. I also noticed that having the root-fs on the eMMC was faster than having it on SD card.

However, having the u-boot and kernel image on SD card was faster than having both in eMMC, so I ended up to a bit weird combination where CPU is loading u-boot and kernel from SD card and kernel uses root-fs from eMMC. Kernel was still packged with gzip. After testing out UPX, LZO and LZ4 I changed packing algorithm to LZO which was fastest on my hardware. Depending on hardware you might want to test other algorithms or having no packing at all.  After changing the packing algorithm and removal of serial console the kernel image size was dropped to 1.3 MB. With these changes the boot time was reduced to 1.94 seconds.

If this would be a production software there is still work to be done in the area of memory configuration. U-boot should be debugged to understand why it takes more time to power up and load the kernel image from eMMC rather than from SD card. In general if quick startup time is a key requirement, the hardware should be designed accordingly. You could have small very fast flash containing the u-boot & kernel directly accessed by the CPU and then having the root-fs a bit slower flash like eMMC. 

Even tough I succeeded to get under 2 seconds I still wondered if I could make it faster. I stripped down the kernel a little bit more by removing the network stack ending up to 1.2 MB kernel with appended device tree. I also ran prelinking to my root-fs because the Vivante drivers come as modules, so I was not able to create static root-fs. I also striped the u-boot spl part a bit, initially it was 31 KB and after removing unwanted parts I ended up with 23 KB boot loader. With these final changes I was able to get the system to boot up in 1.56 seconds.

As a wrap-up here is how the boot time was reduced by different means.

chart2

Last thing that will also affect the boot time is hardware selection. There is a difference between the boards how fast they power up even if they are using the exact same CPU. Perhaps later something more about this.

Do:

  • Measure and analyze where time is spent
  • Set target goal, as early as possible
  • Try to reach the goal early in the development and then keep the level throughout development
  • When designing your software architecture take into account the startup targets
  • Optimize easy parts first, then continue to the details
  • Leverage static linking if that provides better result in your SW & HW configuration
  • Take into account your hardware limitations, preferably design the hardware to allow fast boot time

Do not:

  • Overestimate the performance of your selected hardware. i.MX28 will not give you iPad-like performance.
  • Complicate your software architecture. Simpler architecture runs faster.
  • Load things that are not necessary. Pre-built images contain features for many use cases, so optimization is typically needed.
  • Leave optimization at the end of the project
  • Underestimate the effort required for optimizing the very last milliseconds

So, that concludes our fast-boot blog post series. In these three posts, I showed you that Qt really is up for the task: It is possible to make Qt-powered devices to boot extremely fast to meet industry criteria. It’s actually quite manageable when you know what you’re doing but instead of one silver bullet, it’s a combination of multiple things: good architectural SW design, bunch of Qt Quick tips’n’tricks, suitable hardware and a lot of system image optimization. Thank you for following!


The post Fast-Booting Qt Devices, Part 3: Optimizing System Image appeared first on Qt Blog.

Over-the-Air Updates, Part 1: Introduction

$
0
0

The Qt for Device Creation offering has been successful at bringing many new and exciting products to the market by significantly reducing time-to-market with its pre-configured software stack and toolchains for rapid UI development. We would like to take this a step further by providing an opt-in feature for Over-the-Air (OTA) system updates.

What is an OTA update?

An OTA update is a mechanism of distributing software updates over a wireless network without requiring physical access to a device. For a target device to be able to update wirelessly, it needs to have support for this in software.

The significance of OTA updates.

With everything being connected to the Internet in the Internet of Things era and everyone owning a smartphone, users want more from devices. Expectations for software have changed in a way where OTA has become an increasingly important component when building modern embedded devices. Embedded software now demands the full lifecycle support, including updates for software bugs. Software has to continuously provide new features to attract more users and to retain the existing ones. Being connected to the Internet also means higher exposure to security exploits which need to be addressed in a timely fashion.

With OTA, updates can be sent to all users from a central location – software updates no longer require expensive product recalls, trips to customers nor climbing up a tower to have physical access to a device. With how fast things are changing in the technology world and trends shifting, it is vital to be able to update devices after they have been shipped to the customers. Otherwise they will soon end up in a junk box. We can see OTA updates in all sorts of devices these days, even in cars that traditionally required a trip to the mechanic if software needed to be updated. The times when it was sufficient to deploy the software once, make the medium read-only and ship it are over (of course there still are use cases where this approach is perfectly fine).

System updates are complex.

There are so many things that could go wrong during a software update leaving the system in an inconsistent state. A failed update could render the system unusable – a device that does not boot or goes into an infinite reboot cycle, applications that do not start properly or missing configuration files. Updates could also be compromised or tampered with, so the security aspect should be addressed as well. As you can see, there are a lot of fail vectors to think about. Countless solutions for this problem exist, often ad-hoc, difficult-to-customize, incomplete, distribution-specific or do not meet all the desired requirements. While looking at the many existing update solutions, we have gathered a list of requirements that we consider essential for an OTA update system:

  • Flexible and Reusable.
  • An update solution should not lock you into a specific partition layout, filesystem type or distribution. Porting to new target devices should be straightforward.

  • Atomic Updates.
  • All or nothing. It should be safe to interrupt an update without leaving a system in an inconsistent state. If the update did not fully complete, the currently running system should remain unmodified.

  • Atomic Rollbacks.
  • Atomically switch back to the previous version if the installed update has unwanted side effects.

  • Updates Processing in Background.
  • The update process should not require downtime. Users should be able to use the system while an update is being applied in the background.

  • Secure.
  • Secure transmission of updates with authentication and update integrity verification.

  • Efficient Handling of Disk Space.
  • Many update solutions are based on the partition swap pattern with a lot of duplicated files. This might not be a big issue, but ideally there is a better solution (see below).

  • Bandwidth Optimized.
  • Updates should be as small as possible. This is achieved by various binary-delta technologies by taking advantage of how executable files change. Only the files that have changed should be downloaded, instead of downloading a complete image file.

  • Handle Poor Connectivity and Transmission Failures.
  • When resuming from an interrupted download, only the missing files should be fetched.

  • Fail-safe and Resilient.
  • Have a built-in mechanism for recovering from a disaster. This depends a lot on the specific use case, and therefore should be highly-customizable.

  • Fixed-Purpose System vs Application Store Model.
  • It should support fixed-purpose systems and systems with OS updates (via OTA) at the base and agnostic application delivery mechanism on top. Third party applications need to live in synergy with a base OS and should be able to update independently. This requirement was inspired by the new Minimalist Operating System concept explained in this blog post. Android OS is another good example of this.

  • Versioned System.
  • OTA client devices should replicate content assembled on the server side, instead of resolving dependencies on a target device during software update. This results in a predictable, reproducible and reliable environment – we always know what files are part of a certain system’s version and we can test the exact combination of libraries that will be available on a target device (kind of like snapshotting the system). Third party applications can either use system libraries or run in containers. There should be a user writable location which is shared between versioned systems.

  • Extensible with beautiful Qt/QML APIs.
  • More on this will follow in another blog post.

Meet OSTree and why we selected it as a back-end.

OSTree is a tool that combines a git-like model for committing and downloading bootable filesystem trees, along with a layer for deploying them and managing the bootloader configuration. OSTree is like git in that it checksums individual files and has a content-addressed-object store. It’s unlike git in that it checks out the files via hardlinks from the OSTree repository. Having this hardlink farm means that each system’s version is deduplicated; an upgrade process only costs disk space proportional to the new files, plus some small fixed overhead.

In the OSTree model, operating systems no longer live in the physical “/” root directory. Instead, they parallel install to the new toplevel /ostree directory. At boot time, one of the parallel installed trees is switched to be the real “/” root. This is the base for atomic update and rollback features. The filesystem layout in a booted OSTree system does not look much different from a non-OSTree system. OSTree is in many ways very evolutionary, it builds on concepts and ideas introduced from many different projects. In addition to an OTA update feature, this allows us to bring interesting concepts such as the stateless system to Qt for Device Creation.

OSTree addresses most (and is a direct source for some) of the requirements from the list above and serves as a great base for building OTA update tooling. Currently we are working on APIs and the corresponding tools that brings OTA capability to Qt for Device Creation and makes it simple to integrate with your Qt-based application. OSTree is an open source project (LGPLv2), with the source code available on GitHub.

Conclusion.

A solution for OTA in Qt for Device Creation could further reduce time-to-market and provide the means to conveniently and continuously improve the shipped products. A technology preview for this will be available with Qt 5.7 for Device Creation. In part two of the blog post series I will write about device integration, API, what features we have planned for future releases and I will elaborate more on how OSTree fits into the OTA solution.

The post Over-the-Air Updates, Part 1: Introduction appeared first on Qt Blog.

Graphics improvements for Embedded Linux in Qt 5.7

$
0
0

As is the tradition around Qt releases, it is now time to take a look at what is new on the Embedded Linux graphics front in Qt 5.7.

NVIDIA DRIVE CX

The linux-drive-cx-g++ device spec introduces support for the NVIDIA DRIVE CX platform. This is especially interesting for the automotive world and is one of the foundations of Qt’s automotive offering. Also, DRIVE CX is in fact the first fully supported embedded system with a 64-bit ARM architecture (AArch64). When it comes to graphics, the core enablers for the eglfs and wayland platform plugins were mostly in place for Qt 5.6 since the stack is very similar to what we had on the previous generation Jetson Pro systems. There are nonetheless a number of notable improvements in Qt 5.7:

  • The JIT is now enabled in the QML JavaScript engine for 64-bit ARM platforms. In previous releases this was disabled due to not having had received sufficient testing. Note that the JIT continues to stay disabled on mobile platforms like iOS due to app store requirements.
  • eglfs, the platform plugin to run OpenGL applications without a windowing system, has improved its backend that provides support for setting up EGL and OpenGL via DRM and the EGLDevice/EGLOutput/EGLStream extensions. The code for handling outputs is now unified with the GBM-based DRM backend (that is typically used on platforms using Mesa), which means that multiple screens are now supported on the NVIDIA systems as well. See the documentation for embedded for more information.
  • When it comes to creating systems with multiple GUI processes and a dedicated compositor application based on Wayland, QtWayland improves a lot. In Qt 5.6 the NVIDIA-specific support was limited to C++-based compositors and the old, unofficial compositor API. This limitation is removed in 5.7, introducing the possibility of creating compositor applications with QML and Qt Quick using the modern, more powerful compositor API which is provided as a technology preview in Qt 5.7.

    One notable limitation for Qt Quick-based compositors (with no serious consequences in practice) on the DRIVE CX is the requirement for using a single-threaded render loop. The default threaded one is fine for applications, but the compositor process requires to be launched with the environment variable QSG_RENDER_LOOP=basic (or windows) for the time being. This may be lifted in future releases.
  • If Qt-based compositors are not desired, Qt applications continue to function well as clients to other compositors, namely the patched Weston version that comes with NVIDIA’s software stack.

NXP i.MX7

Qt is not just for the high-end, though. Qt 5.7 introduces a linux-imx7-g++ device spec as well, which, as the name suggests, targets systems built on the NXP i.MX7. This features no GPU at the moment, which would have been a deal breaker for Qt Quick in the past. This is not the case anymore.

With the Qt Quick 2D Renderer such systems can too use most of the features and tools Qt Quick offers for application development. See our earlier post for an overview. Previously commercial-only, Qt 5.7 makes the 2D Renderer available to everyone under a dual GPLv3/commercial license. What is more, development is underway to further improve performance and integrate it more closely with Qt Quick in future releases.

That’s it for now, enjoy Qt 5.7!

The post Graphics improvements for Embedded Linux in Qt 5.7 appeared first on Qt Blog.

Announcing The Qt Automotive Suite

$
0
0


Today we announce the launch of the first generation of the Qt Automotive Suite.

The idea for the Qt Automotive Suite was born when The Qt Company, Pelagicore and KDAB sat down and shared their experiences of projects using Qt for In-vehicle Infotainment (IVI). With cumulative experience from over 20 automotive projects it was noted how Qt is really well suited to the needs of building IVIs and Instrument Clusters, that there were already millions of vehicles on the road with Qt inside, and that there were a lot of ongoing projects. There was though a feeling that things could be even better, that there were still a few things holding back the industry, contributing to the sense that shipped IVI systems could be built faster, cheaper and with a higher quality.

One observation was that additional infrastructure components and tooling were being created. While it is great to see software being built on top of Qt, from an industry perspective it is inefficient with duplication of work, little reuse across projects and engineering resources being used to maintain them rather than focusing on differentiating features. So we’ve added some of these components to the Qt Automotive Suite and will continue to add more over time.

Another observation was that industry practices had been slow to change from when IVI was simply a radio with a two-line display. Then, writing a specification and outsourcing the implementation worked well. Now there are multiple screens in the car that represent the digital UX and allow the user to physically interact with the brand. This digital UX needs to be perfectly integrated with the entire interior design making it almost impossible to perfect a consistent user experience first time in the design house: some refinement is inevitable when the HMI is tested in-vehicle and unanticipated usability problems are found. We are seeing changes in the industry with OEMs taking control of not just the HMI design but also its development. The tools we are adding will make it faster to try out UI changes and to deploy to the target. More iterations mean a more refined UX and a better experience for the end customer.

Automotive Suite Architecture

What is the Automotive Suite? A picture is better than a thousand words so here’s what it looks like with the parts outlined in red specific to the Automotive Suite.

QtAutomotiveSuiteArchitecure

All the added pieces were carefully selected with the goal to make it faster to build better in-vehicle experiences. Let’s now describe some of the components in the diagram above and why we added them.

Qt for Device Creation

The Qt Automotive Suite inherits all the good parts of Qt for Device Creation. This include the QML language for building modern user interfaces, Wayland support with the Qt Wayland Compositor, Qt WebEngine based on Chromium, remote deploy and debugging directly to your target board and a comprehensive class library including multimedia and networking to make writing application logic faster and more fun.

The Application Manager and Compositor

IVI systems are getting more complex and building a complex UI with a single application is becoming unwieldy and fragile. The Application Manager and Compositor bring a modern multi-process architecture to Linux in the car. Separating the HMI into different functional units allows independent teams to develop and test both separately and simultaneously, reducing project risk and shortening development time. Splitting the UI into smaller applications also makes it easier to do system updates; smaller pieces of code are touched and the OTA updates are smaller.

The Qt Wayland Compositor, which debuts as a technical preview in Qt 5.7, is integrated with the Application Manager which can be used to take care of a virtual keyboard and notifications as well as compositing the displays from multiple applications. How these different displays are composited is completely up to the HMI design team, with the QML language being used to define the layout and behavior of output from each application.

The Application Manager handles the complete lifecycle of an application. It validates the installation package and can handle API access permissions. If the Application Manager determines that the system is running low on resources, for example memory, it can shut down idle applications.

Application launch time is fast due to pre-forking a process to run the application.

Applications

We advocate splitting the HMI into applications. There might be one for media playback, another for phone call handling and another for display vehicle status. These have to talk to the middleware so we’ve build a set of cross-platform Qt APIs called QtIVI to abstract these from the underlying middleware.

QtIVI – Automotive APIs

The QtIVI APIs introduces a level of standardization within the Qt ecosystem for how to access automotive-specific APIs. The goal is to promote reuse: applications developed in one generation of program can be reused on the next, even if the underlying platform is different. This is particularly important as OEMs are increasingly taking control of the car HMI development.

The QtIVI APIs follow a pattern to provide common, but extendable, Qt interfaces integrating to the various platform middleware components used by the various OEMs. This means that the same function is exposed through the same interface, even if the implementation is completely different. The core functionality can also include a channel to the Application Manager to check to see whether the application calling a particular component has permission to use the API.

As and where it makes sense, we will provide backends for GENIVI, QNX and AGL. In the future there will also be backends that work with the desktop device emulator, described next.

Device emulation

One thing we’ve found in automotive programs is that there are never enough hardware units to go around and they are never available early enough in the development cycle. Qt for Device Creation includes an emulator for testing your application on the desktop so we will be extending it to support all the QtIVI APIs. This will allow the inputs to be simulated or even scripted to do what you want so the whole system can be tested on the bench. Not only will this be great for developers, it will also be great for QA, allowing input values to be scripted and even out-of-range value to be tested.

QML Live – Update the UI on a Live System

Getting the UI correct is typically an iterative cycle. Do a design, implement it and see how it looks. The faster a design can be tested, the more iterations and the better the end result. Usually, testing a new UI design involves a compile, link and flashing of the device. With QML Live a change to a QML file can be seen running on a live system as soon as the Save button is hit. This makes tuning color schemes, fonts, and animations on target display just so much more productive.

Deploy to Target & Debugging from Qt Creator

Qt for Device Creation is our product for embedded systems. A key feature is being able to build and download an app to the target device and optionally launch a debugger all with one click from within the Qt Creator IDE. The Automotive Suite includes this functionality which removes the lengthy device flashing stage which makes developers much more productive.

Profiling & Diagnostics

Qt Creator already provides remote debugging tools. It also provides profilers to see how long your QML code is taking to execute which is critical for ensuring smooth 60fps operation and instant start-up. The Qt Automotive Suite deeply integrates an additional tool called GammaRay into QtCreator which allows for runtime introspection, visualization and manipulation of internal structures such as scene graphs and state machines. This can provide an insight into the running system to diagnose those hard problems and understand where memory is being used.

Each automotive program and platform is different and great tools that increase productivity need to be extensible and tailored to a specific context. For that reason GammaRay also provides building blocks for the creation of visualization and diagnosis of proprietary frameworks, specialized hardware or protocols, custom controls or third party components. So if there is a specific aspect of the system you routinely need to look at in depth, GammaRay can be extended to do that in a way that integrates seamlessly with the existing development tools.

SDK Creation

Many times, parts of the system functionality will be delivered by second and third parties. Or third parties may want to develop apps specifically for your platform. The Qt Automotive Suite makes it easy to build a redistributable SDK that contains your specific HMI assets and added middleware together with the Qt tooling to allow 3rd parties to build and test their apps with minimal intervention.

Open Development Model

The Qt Automotive Suite will be developed in the same open manner as Qt itself. The code is available at http://code.qt.io/cgit/ and there is an automotive specific mailing list for discussions on engineering and product direction.

Availability

The Qt Automotive Suite v1.0 is timed for release towards the end of June, shortly after the availability of Qt 5.7. It will support any Linux and work just fine and for anyone wanting to quickly try it out we have pre-built yocto stacks for the Boundary Devices Sabre-Lite i.MX6 board and for customers of the NVIDIA DriveCX. For QNX, the tooling works with both QNX 6.6 and QNX Car 2 in combination with the native Application Manager and Compositor.

Summary

The goal of the Qt Automotive Suite is to make building of IVIs faster with a combination of software components, automotive APIs and tooling. It will be available under both commercial and Open Source licenses. This is just the start and we will be adding functionality and improving the tooling with each release. If you want to talk to someone about this fabulous new toolkit, please fill in the form https://www.qt.io/contact-qtauto.


The post Announcing The Qt Automotive Suite appeared first on Qt Blog.

New Compositor API for Qt Wayland

$
0
0

As part of the forthcoming Qt 5.7, we are happy to be releasing a tech preview of the new Qt Wayland Compositor API. In this post, I’ll give you an overview of the functionality along with few examples on how to create your own compositors with it.

Wayland is a light-weight display server protocol, designed to replace the X Window System. It is particularly relevant for embedded and mobile systems. Wayland support in Qt makes it possible to split your UI into different processes, increasing robustness and reliability. The compositor API allows you to create a truly custom UI for the display server. You can precisely control how to display information from the other processes, and also add your own GUI elements.

Qt Wayland has included a compositor API since the beginning, but this API has never been officially released. Now we have rewritten the API, making it more powerful and much easier to use.

Here’s a snapshot of a demo that we showed at Embedded World: it is a compositor containing a launcher and a tiling window manager, written purely in QML.

embedded

We will keep source and binary compatibility for all the 5.7.x patch releases, but since this is a tech preview, we will be adding non-compatible improvements to the API before the final release. The Qt Wayland Compositor API is actively developed in the dev branch of the Qt git repository.

The Qt Wayland Compositor tech preview will be included in the Qt for Device Creation packages. It is not part of the Qt for Application Development binary packages, but when compiling Qt from source, it is built by default, as long as Wayland 1.6 is installed.

What is new?

  • It is now possible to write an entire compositor in pure QML.
  • Improved API: Easier to understand, less code to write – both QML and C++ APIs
  • Completely reworked extension support: Extensions can be added with just a few lines of QML, and there’s a powerful, easy-to-use C++ API for writing your own extensions.
  • Multi-screen support
  • XDG-Shell support: Accept connections from non-Qt clients.
  • And finally, a change that is not visible in the API, but should make our lives easier as developers: We have streamlined the implementation and Qt Wayland now follows the standard Qt PIMPL(Q_DECLARE_PRIVATE) pattern

Take a look at the API documentation for more details.

Examples

Here is a complete, fully functional (but minimalistic) compositor, written purely in QML:

import QtQuick 2.6
import QtQuick.Window 2.2
import QtWayland.Compositor 1.0

WaylandCompositor {
    id: wlcompositor
    // The output defines the screen.
    WaylandOutput {
        compositor: wlcompositor
        window: Window {
            visible: true
            WaylandMouseTracker {
                anchors.fill: parent
                enableWSCursor: true
                Rectangle {
                    id: surfaceArea
                    color: "#1337af"
                    anchors.fill: parent
                }
            }
        }
    }
    // The chrome defines the window look and behavior.
    // Here we use the built-in ShellSurfaceItem.
    Component { 
        id: chromeComponent
        ShellSurfaceItem {
            onSurfaceDestroyed: destroy()
        }
    }
    // Extensions are additions to the core Wayland 
    // protocol. We choose to support two different
    // shells (window management protocols). When the
    // client creates a new window, we instantiate a
    // chromeComponent on the output.
    extensions: [
        WlShell { 
            onShellSurfaceCreated:
                chromeComponent.createObject(surfaceArea, { "shellSurface": shellSurface } );
        },
        XdgShell {
            onXdgSurfaceCreated:
                chromeComponent.createObject(surfaceArea, { "shellSurface": xdgSurface } );
        }
    ]
}

This is a stripped down version of the pure-qml example from the tech preview. And it really is a complete compositor: if you have built the tech preview, you can copy the text above, save it to a file, and run it through qmlscene:
minimalcompositor

These are the commands I used to create the scene above:

./bin/qmlscene foo.qml &
./examples/widgets/widgets/wiggly/wiggly -platform wayland &
weston-terminal &
./examples/opengl/qopenglwindow/qopenglwindow -platform wayland &

The Qt Wayland Compositor API can of course also be used for the desktop. The Grefsen compositor (https://github.com/ec1oud/grefsen) started out as a hackathon project here at the Qt Company, and Shawn has continued developing it afterwards:

grefsen

C++ API

The C++ API is a little bit more verbose. The minimal-cpp example included in the tech preview clocks in at 195 lines, excluding comments and whitespace. That does not get you mouse or keyboard input. The qwindow-compositor example is currently 743 lines, implementing window move/resize, drag and drop, popup support, and mouse cursors.

This complexity gives you the opportunity to define completely new interaction models. We found the time to port everyone’s favourite compositor to the new API:

mazecompositor

This is perhaps not the best introduction to writing a compositor with Qt, but the code is available:
git clone https://github.com/paulolav/mazecompositor.git

What remains to be done?

The main parts of the API are finished, but we expect some adjustments based on feedback from the tech preview.

There are still some known issues, detailed in QTBUG-48646 and on our Trello board.

The main unresolved API question is input handling.

How you can help

Try it out! Read the documentation, run the examples, play around with it, try it in your own projects, and give us feedback on anything that can be improved. You can find us on #qt-lighthouse on Freenode.

The post New Compositor API for Qt Wayland appeared first on Qt Blog.

Qt 5.7 for Device Creation

$
0
0

With the Qt 5.7, we’ve improved a lot of things inside our offering for embedded device creation, the Qt for Device Creation product. Here’s a brief overview on what has happened on this side, in addition to the enhancements to the other Qt 5.7 libraries many of which also facilitate the embedded development like for instance the new Qt Quick Controls 2.0. One of the biggest visible item inside our device creation offering is the Boot to Qt software stack, but in addition to just providing pre-built images, we’ve made our approach as customizable and easily installable as possible by harmonizing our work with the tooling from the Yocto Project.

Working with the Yocto Project

The Yocto Project is an open source collaboration project that provides templates, tools and methods to help you create custom Linux-based systems for embedded products regardless of the hardware architecture. We have leveraged Yocto internally for a long time and for the past year we have been working together with meta-qt5, the open source Yocto compatible meta layer dedicated for building Qt modules for your embedded devices. We are working upstream within the Yocto Project and in addition we have a mirror of the meta-qt5 layer within the Qt Project to ensure it always works with the latest Qt version. The layer was also recently updated to provide recipes for the previously commercial modules (Qt Virtual Keyboard, Qt Charts and Qt Data Visualization), which are now also available with a GPL license for open source users of Qt 5.7.0. In addition, we in Qt are providing our own distro layer called meta-boot2qt. It is a glue which combines the vendor specific BSP layers and meta-qt5 into one package. In meta-boot2qt layer there are defined the stable and tested versions of the different software components so that it is you can kickstart you embedded project with your favorite hardware.

In all, our target has been to utilize the standardized Yocto Project mechanisms so that our offering is as compatible with Yocto Project as possible. With Qt 5.7, the pieces are nicely in place.

New Device Images

We’ve also updated the hardware selection for our pre-built software images with two new additions:

For these, and the other common development boards, we provide the pre-built image with our SDK installer. You can flash the device with the image and immediately get started with embedded development.

Windows Host Support

Few months ago with Qt 5.6, we introduced the possibility of using Windows host computer for embedded Linux development and deployment as a tech preview. With Qt 5.7 we’ve polished the solution even further and this is now fully supported.


Over-the-Air Updates (OTA)

A new piece of technology that we’re introducing with Qt 5.7 for device creation is an OSTree-based solution for Over-the-Air software updates for the whole software stack. For the full story, please take a look at the separate blog post.

Graphics Updates

On the graphics side, we’ve added new configuration specs for NVIDIA DRIVE CX and NXP i.MX7. Laszlo wrote a full story around these in the blog last week, so read more from his post.

Qt Device Utilities

One part of our embedded offering is the Qt Device Utilities module that allows users to manipulate easily various embedded device settings via simple QML APIs.

Here’s short overview of the different settings the new Qt Device Utilities has to offer:

  • QtDeviceUtilities.NetworkSettings
    • Network settings utilizes Connman backend and exposes settings for discovering, configuring and connecting to ethernet networks and wifi access points.
  • QtDeviceUtilities.DisplaySettings
    • Display settings allows user to set display’s brightness level and change the physical screen size.
  • QtDeviceUtilities.TimeDateSettings
    • Time & Date settings provides functions to adjust system timezone, date and time settings either manually or automatically using NTP (Network Time Protocol)
  • QtDeviceUtilities.LocaleSettings
    • Locale settings allows to change current system locale including language and regional format
  • QtDeviceUtilities.LocalDeviceSettings
    • Provides utility functions for controlling an embedded device shutdown and reboot
  • QtDeviceUtilities.BluetoothSettings
    • Bluetooth settings allows to discover and connect to various bluetooth devices utilising Bluez backend (http://www.bluez.org/)
  • QtDeviceUtilities.SettingsUI
    • Settings UI QML component to display settings UI made with Qt Quick Controls 2

If you want to take a look at the new settings, we’ve updated the default demo launcher for the Boot to Qt image to use the new QtDeviceUtilities.SettingsUI plugin:

screenshot3


New display settings under Boot to Qt demo launcher, using the new Utilities module and Qt Quick Controls 2

Some of the new settings under Boot to Qt demo launcher, using the new Utilities module and Qt Quick Controls 2


So, that’s pretty much it. Hope you enjoy Qt 5.7 for Device Creation!

For the customers with Qt for Device Creation license, you can find Qt for Device Creation components using your online installer. If you do not yet have Qt for Device Creation and want to try it out, please contact us to request an evaluation of Qt for Device Creation.

The post Qt 5.7 for Device Creation appeared first on Qt Blog.


Over-the-Air Updates, Part 2: Device Integration, API and Creating Updates

$
0
0

With Qt 5.7 for Device Creation we introduced a new piece of technology – an OSTree-based solution for Over-the-Air software updates for the whole software stack. For a more detailed introduction about this new component of the Boot to Qt software stack, read part one of the blog post series. This blog post contains a step-by-step guide on how to add OTA update capability to your Boot to Qt device, discusses Qt OTA API and finally demonstrates how to generate OTA updates for shipped devices.

Device Selection.

For this tutorial we are going to use the Intel NUC board – a new reference device in Qt 5.7 for Device Creation. Intel NUC is a low-cost, pint-sized powerhouse solution for a wide variety of fields, including Internet of Things where OTA update capability is especially desired. I chose this board for the tutorial because it is not your traditional ARM-based embedded Linux board that uses the U-Boot bootloader. Instead, Intel NUC is a x86-64 target with the GRUB 2 bootloader. The OTA solution in Technology Preview supports U-Boot and GRUB 2 bootloaders, and adding support for additional bootloaders is a straightforward task (as long as a bootloader has the means to read from an external configuration file).

Device Integration Steps.

I won’t go into too much detail at each step, as that is already covered in the OTA documentation. The goal of this tutorial is to show the necessary steps to add OTA capability to a device and to demonstrate that it doesn’t require months of effort to add such a capability. Rather, it takes just a few hours when using the OTA solution from Qt for Device Creation.

1. Generate OSTree boot compatible initramfs image.

This step requires booting the device with the sysroot to be released, so that the tool can generate initramfs that match the kernel version of the release. The device has to be connected to the machine from which you will run the generate-initramfs tool:

SDK_INSTALL_DIR/Tools/ota/dracut/generate-initramfs

2. Bootloader integration.

This is the only step that requires manual work. The bootscript used by your device has to be changed to use the configurations that are managed by OSTree. This will ensure that, after OTA updates or rollbacks, the correct kernel version (and corresponding boot files) will be selected at boot time. On U-Boot systems this requires sourcing uEnv.txt and then integrating the imported environment with the bootscript. On GRUB 2 systems, whenever the bootloader configuration files need to be updated, OSTree executes the ostree-grub-generator shell script to convert bootloader-independent configuration files into native grub.cfg format. A default ostree-grub-generator script can be found in the following path:

SDK_INSTALL_DIR/Tools/ota/qt-ostree/ostree-grub-generator

This script should be sufficient for most use cases, but feel free to modify it. The ostree-grub-generator file contains additional details. The script itself is about 40 lines long.

3. Convert your sysroot into an OTA enabled sysroot.

The conversion is done using the qt-ostree tool.

sudo ./qt-ostree \
--sysroot-image-path ${PATH_TO_SYSROOT} \
--create-ota-sysroot \
--ota-json ${OTA_METADATA} \
--initramfs ../dracut/initramfs-${device}-${release} \
--grub2-cfg-generator ${CUSTOM_GENERATOR}

This script will do all the necessary work to convert your sysroot into an OTA enabled sysroot. The ${OTA_METADATA} is a JSON file containing the system’s metadata. The following top-level fields have convenience methods in the Qt/QML OTA API: version and description. The API provides the means of manually fetching and parsing the file (which consequently can contain arbitrary metadata describing the sysroot).

4. Deploy the generated OTA image to an SD card.

sudo dd bs=4M if=<image> of=/dev/<device_name> && sync

5. Test that everything went according to plan.

Boot from the SD card and run the following command from the device:

ostree admin status

The output should be something similar to:

* qt-os 36524faa47e33da9dbded2ff99d1df47b3734427b94c8a11e062314ed31442a7.0
origin refspec: qt-os:linux/qt

Congratulations! Now the device can perform full system updates via a wireless network. Updates and rollbacks are atomic and the update process can safely be interrupted without leaving the system in an inconsistent state. If an update did not fully complete, for example due to a power failure, the device will boot into an unmodified system. Read about the other features of the update system in the OTA documentation.

User Space Integration.

With the device being OTA capable, we need to take advantage of that. We provide C++ / QML APIs to make OTA update functionality integration with Qt-based applications a breeze. Offline operations include querying the booted and rollback system version details and atomically performing the rollbacks. Online operations include fetching a new system version from a remote server and atomically performing system updates. A basic example that demonstrates the API:

Label { text: "CLIENT:"; }
Label { text: "Version: " + OTAClient.clientVersion }
Label { text: "Description: " + OTAClient.clientDescription }
Label { text: "Revision: " + OTAClient.clientRevision }

Label { text: "SERVER:"; }
Label { text: "Version: " + OTAClient.serverVersion }
Label { text: "Description: " + OTAClient.serverDescription }
Label { text: "Revision: " + OTAClient.serverRevision }

Label { text: "ROLLBACK:"; }
Label { text: "Version: " + OTAClient.rollbackVersion }
Label { text: "Description: " + OTAClient.rollbackDescription }
Label { text: "Revision: " + OTAClient.rollbackRevision }

RowLayout {
    Button {
        text: "Fetch OTA info"
        onClicked: OTAClient.fetchServerInfo()
    }
    Button {
        visible: OTAClient.rollbackAvailable
        text: "Rollback"
        onClicked: OTAClient.rollback()
    }
    Button {
        visible: OTAClient.updateAvailable
        text: "Update"
        onClicked: OTAClient.update()
    }
    Button {
        visible: OTAClient.restartRequired
        text: "Restart"
        onClicked: log("Restarting...")
    }
}

The above sample presents version information for the booted and rollback system, as well as what system version is available on a remote server. The sample program also contains buttons to initiate OTA tasks. The code below is used for logging OTA events. The API is still in Technology Preview, so the final version might have slight changes.

Connections {
    target: OTAClient
    onErrorChanged: log(error)
    onStatusChanged: log(status)
    onInitializationFinished: log("Initialization " + (OTAClient.initialized ? "finished" : "failed"))
    onFetchServerInfoFinished: {
        log("FetchServerInfo " + (success ? "finished" : "failed"))
        if (success)
            log("Update available: " + OTAClient.updateAvailable)
    }
    onRollbackFinished: log("Rollback " + (success ? "finished" : "failed"))
    onUpdateFinished: log("Update " + (success ? "finished" : "failed"))
}

This API could easily be used to write a daemon that communicates its version details to the server and the daemon could send a notification to the user when an update becomes available. The server could send out updates in batches, first updating a small subset of devices for field testing, fetching update statuses from daemons and if there are no issues, update the remaining devices. Some tools for this type of tasks are in the roadmap of OTA solution for the Boot to Qt stack.

Ship it! Some time later … a critical bug emerges.

As we took a precaution and built an embedded device with OTA capability as well as creating a Qt application for handling updates, there are only few simple steps to follow to resolve the issue.

1. Fix the bug.

I will leave the details up to you 😉 We will use the updated sysroot in the next step.

2. Generate an update.

This is done by using the qt-ostree tool. Generating an OTA update is a completely automated task.

sudo ./qt-ostree \
--sysroot-image-path ${PATH_TO_SYSROOT_WITH_THE_FIX} \
--ota-json ${OTA_METADATA_DESCRIBING_NEW_SYSROOT} \
--initramfs ../dracut/initramfs-${device}-${release}

The above command will create a new commit in the OSTree repository at WORKDIR/ostree-repo/, or create a new repository if one does not exist. This repository is the OTA update and can be exported to a production server at any time. OSTree repositories can be served via a static HTTP server (more on this in the next blog post).

3. Use Qt OTA API to update devices.

It is up to system builders to choose an update strategy.

Availability

The Boot to Qt project leverages The Yocto Project to built its own distribution layer called meta-boot2qt. The Boot to Qt distribution combines the vendor specific BSP layers and meta-qt5 into one package. This distribution is optimized to make the integration with the OTA tooling as simple as possible. All source code is available under commercial and GPL licenses.

Conclusion

Enabling the OTA update feature on Boot to Qt devices is a quick and worthwhile task. With OTA enabled devices you can ship your products early and provide more features later on. In the next blog post I will write about OSTree (OTA update) repository handling, remote configuration and security.

The post Over-the-Air Updates, Part 2: Device Integration, API and Creating Updates appeared first on Qt Blog.

Status Update on Qt for WinRT / UWP

$
0
0

It has been a long while since we were writing on this blog about the WinRT port of Qt.

Hence, this is going to be a longer article on what we achieved in the meanwhile, are currently working on, and what we will provide in future releases.

Supported Platforms

WinRT as a platform API set has been continuously improved and new features have been added which Qt can make use of, allowing us to provide more of Qt API to developers. One example is drag and drop support.

Many of you might have heard of the terminology Universal Windows Platform, or UWP. This describes a rather high level abstraction, in the end it boils down to the WinRT API being used and extended. Hence, the Qt for WinRT version currently supports the following platforms:

  • Windows 8.1
  • Windows Phone 8.1
  • Windows 10
  • Windows 10 Mobile
  • Windows 10 IoT (Core/Professional) *
  • Microsoft Hololens *
  • XBOX One *

* I will talk about those platforms later. 

Previous / Current Qt releases

Qt 5.6 marked an important release for the port as we needed to exchange a lot of the internals to be able to integrate custom Xaml content into a Qt application. One example of achieving this was to enable support for Qt WebView, which integrates Microsoft Edge into a Qt application. In case you have your own custom Xaml content you need integrated, I recommend to take a look at the source code. You will recognize that there are some caveats on what you need to do from which thread.

Furthermore, we have been working a lot on camera support in Qt Multimedia, added synthesis of Pen events to use it e.g. on Surface devices and general bug fixes and stability improvements. At Qt 5.6 is a LTS release, we will also continue to update this branch and provide fixes for crucial bug reports.

In addition Qt 5.6.1 includes two workflow changes I would like to highlight:

  1. Creating a Visual Studio project with qmake does not require to add CONFIG+=windeployqt anymore. We have recognized that almost all users use this option instead of manually deploying or collection libraries and plugins for the package. Hence, we enabled it by default.
  2. We added a default capability feature for the template manifest. As an example, if you use QT+=multimedia in your project, this will automatically add webcam and microphone capabilities to your project. The benefit is that during development you will have all features available without considering which capability matches which feature. However, you have to make sure to remove non required capabilities during the publishing process. For instance, the internetClientServer capability is enabled by default allowing an app to act as a server. In most cases you will not need this capability for your app.

Moving on to Qt 5.7 there are two features to emphasize about Qt on WinRT.

First of all, we added a low latency audio plugin, utilizing WASAPI. This was due to huge request by users. Additionally, this plugin can also be used for classic development, meaning regular desktop applications. The advantage against the windowsaudio backend using WaveOut is clearly found in latency. According to Microsoft the guaranteed latency has been greatly reduced in Windows 10 and later releases and you will be able to utilize it with Qt plugin. The downside is that WASAPI synchronizes the sample-rate to the audio driver without providing any conversion capabilities for a developer. Hence, you are responsible for converting between sample rates in case those do not match. The plugin is not enabled by default for the desktop platforms, but you can compile, test and use it from our git repository or source package.

One additional item we have added with experimental support is to use JIT in the QmlEngine on x86 and x64 architectures. You might remember that initially this was not supported for the Windows Store. However, this seems to have changed even though there is no public statement or documentation about this yet. Using JIT can speed up your application significantly depending on your use cases, for instance some test functions in the engine auto tests executed faster by a factor of 100+. To enable this in your WinRT app, all you have to do is add the codeGeneration capability in your manifest, recompile your appx and start testing. From our experiments it is possible to push and publish an app in the Windows Store, however it is not guaranteed that this feature will stay. We have been told that this capability is mostly used for .NET native, but also (or because of it) allows VirtualAllocFromApp/VirtualFree to succeed. 

Future Qt releases

We would like to see JIT also available on ARM to use it for on mobile platforms and also Windows 10 IoT Core, where speed improvements are even more crucial. Unfortunately, the current public API does not provide us everything we need, for instance flushing cache lines is not supported. Once those items are public, we can continue on topic and we will keep you updated. You can also watch the WIP in the meanwhile.

Qt 5.8 is already shaping up with feature freeze approaching in less than a month. Hence I would like to summarize a couple of items we have been working on for this release.

Again, we validated the reports for WinRT with the highest votes to get an understanding what is most important for users and customers. From that list Qt 5.8 will add support for BTLE and Qt Purchasing to publish applications in the Windows Store using In App Products.

Qt Speech will be part of Qt 5.8 as a tech preview module, including support for WinRT using the Speech Synthesizer API.

Lastly, you might have read about our efforts to decouple the hard dependency of Qt Quick on OpenGL and providing additional backends. Laszlo has been doing an incredible job adding a D3D12 backend, which will also work for WinRT. For more information, you can read the snapshot documentation.

Platform Ammendment

Windows 10 IoT Core / Professional

Microsoft has introduced a new line of embedded operating systems called Windows 10 IoT. This is based on the Windows 10 architecture and comes with a limited feature set tailored towards embedded use-cases. For instance, no window manager / compositor is supported, only one application is supposed to show full screen. There are images available for various embedded devices, like the Raspberry Pi or the Dragonboard 410c, but the user experience might vary heavily depending on the snapshot of the image and its driver status. There is no graphics acceleration for the Raspberry Pi, causing Qt for WinRT to use the WARP software renderer with fairly bad fps rendering and a broken user experience. The Dragonboard has graphics acceleration and visually it is way more appealing, but you might experience troubles in other areas.

Microsoft Hololens

Unfortunately, we did not have the chance yet to experiment with the Hololens physically. But there are emulator images available and according from our experience using those, Qt does run on the Hololens. When publishing your app to the Store you can select the Hololens as an additional target to deploy to. In case you have experience with Qt on this device, feel free to get in touch with us.

XBOX One

The XBOX One will be opened towards 3rd party developers in one of its upcoming releases. Developers are already capable of setting the console into development mode and start coding on it. Using Qt for WinRT you will be able to develop Qt applications for the XBOX One and, once enabled, push those to the Store. From our experience input handling is not working to our fullest satisfaction, but we will work on this in the nearer future.


Moving further into the future there a lot of items we would like to do for the WinRT port, but we also need your feedback on what is important for developers. Hence I would like to ask every developer on this platform to vote and/or create items on our bugtracker. For easier tracking, all WinRT related items have QtPorts:WinRT as component.


The post Status Update on Qt for WinRT / UWP appeared first on Qt Blog.

Aligning with the Yocto Project

$
0
0

We have leveraged Yocto internally for many years to build our reference “Boot to Qt” embedded Linux stack of Qt for Device Creation. During 2015 we started to align our work with upstream Yocto Project, including contributions to improve the meta-qt5 layer. With Qt 5.7 we have also opened our meta-boot2qt layer in order to make it easier to co-operate with semiconductor vendors, open-source community as well as the customers using Qt for Device Creation.

The Yocto Project is an open source collaboration project that provides templates, tools and methods to help create custom Linux-based systems for embedded products regardless of the hardware architecture. The Yocto project is derived from the OpenEmbedded project and it shares core part of the metadata, recipes and tools with OpenEmbedded. The reference distribution of the Yocto Project is called Poky. It contains the OpenEmbedded Build System (BitBake and OpenEmbedded Core) as well as a set of metadata to get you started building your own distro. In addition there are available lot of metalayers which variate the core layers and add additional components, configurations and rule scripts for creating vendor specific distributions. Goal of the Yocto Project is to de-mystify the art of making embedded Linux distributions, helping both the technology providers to co-operate more efficiently and the device makers to better manage the exact distribution they have in their device.

The Qt Company is now proudly also an official Yocto Project Participant:

Yocto_Project_Badge_Participant_Web_RGB

For the past year we have been actively working together with meta-qt5, the Yocto compatible meta layer dedicated for building Qt modules for your embedded devices. The layer was also recently updated to provide recipes for the previously commercial modules (Qt Virtual Keyboard, Qt Charts and Qt Data Visualization), which are now open source in Qt 5.7. We have offered Yocto based reference images since Qt 5.1, and we released our first reference images based on meta-qt5 with Qt for Device Creation 5.6.0 and continue the work with the latest 5.7.0 release. The 5.7.0 release is based on Yocto 2.0 (Jethro), and idea is to update the Yocto release version for each minor Qt version, when suitable stable release is available. In order to provide support for the latest version of Qt, we have a mirror of meta-qt5 in the Qt Project repository. We do work upstream as much as possible, and are also welcome to host the upstream meta-qt5 repository under the Qt Project (currently it is in github).

Since the meta-qt5 layer provides only recipes for building the Qt modules, we have created a separate Boot to Qt meta layer, meta-boot2qt, which takes care of building the images and toolchains for the reference devices. The meta-boot2qt layer integrates all the required BSP meta layers, so there is no manual configurations necessary when starting Yocto build for one of the Qt reference devices. The layer was previously available only for our commercial customers, but with Qt 5.7 we have open sourced it as well. To get started with meta-boot2qt, clone the repository for meta-boot2qt and follow the instructions of building your own embedded Linux image in the Qt documentation.

Currently Qt for Device Creation and the meta-boot2qt layer contains support for many commonly available development boards and production hardware:

  • Raspberry Pi (raspberrypi)
  • Raspberry Pi 2 (raspberrypi2)
  • Raspberry Pi 3 (raspberrypi3)
  • BeagleBone Black (beaglebone)
  • Boundary Devices (i.MX6 Boards nitrogen6x)
  • Freescale SABRE SD (i.MX6Quad imx6qsabresd)
  • Freescale SABRE SD (i.MX6Dual imx6dlsabresd)
  • Toradex Apalis iMX6 (apalis-imx6)
  • Toradex Colibri iMX6 (colibri-imx6)
  • Toradex Colibri VF (colibri-vf)
  • Kontron SMARC-sAMX6i (smarc-smax6i)
  • Intel NUC (intel-corei7-64)
  • NVIDIA DRIVE CX (tegra-t18x)
  • Qt for Device Creation Emulator (emulator)

Qt works with much wider variety of hardware than we have as reference devices, so if your hardware is not listed it does not mean it can’t be used. We are offering convinient pre-built binaries for the reference devices as part of the Qt for Device Creation installer. With the Yocto tooling it is easy to take these as a starting point and tune the image according to your specific needs. If you do not yet have Qt for Device Creation, please ask and we’ll provide you with a free evaluation. If you need help with Yocto or other things, please contact us or one of the official Qt Partners to get a boost into your embedded development.


The post Aligning with the Yocto Project appeared first on Qt Blog.

Qt WebBrowser 1.0

$
0
0

We have recently open sourced Qt WebBrowser!

Screenshot of the Qt WebBrowser.
Qt WebBrowser (codename Roadtrip) is a browser for embedded devices developed using the capabilities of Qt and Qt WebEngine. Using Chromium, it features up-to-date HTML technologies behind a minimal but slick touch-friendly user interface written in Qt Quick.

All basic browser features are supported: You can search for text (both in history and via Google). You can bookmark pages, navigate in the page history, and open multiple pages concurrently. Depending on the codecs available, full-screen video and audio playback should also just work. You can also enable a private browser mode that leaves no traces after the browser is closed.

So far the browser has been only shipped as part of the Qt for Device Creation demo, but we’re now releasing it also separately under GPLv3 and Commercial licenses. The browser serves as a testbed and demo for Qt and Qt WebEngine, but we see that it can also be used in your device solutions. So please talk to us if you have any kind of feedback, particularly feature requests! The preferred place is JIRA, but you can also just drop us a mail.

The browser is optimized for embedded touch displays (running Linux), but you can play with it on the desktop platforms, too! Just make sure that you have Qt WebEngine, Qt Quick, and Qt VirtualKeyboard installed (version 5.7 or newer). For optimal performance on embedded devices you should plan for hardware-accelerated OpenGL, and around 1 GiByte of memory for the whole system. Anyhow, depending on your system configuration and the pages to be supported there is room for optimization.

More details about the browser’s user interface and capabilities can be found in the documentation. The source code is hosted on code.qt.io.

The post Qt WebBrowser 1.0 appeared first on Qt Blog.

The Qt Quick Graphics Stack in Qt 5.8

$
0
0

This is a joint post with Andy. In this series of posts we are going to take a look at some of the upcoming features of Qt 5.8, focusing on Qt Quick.

OpenGL… and nothing else?

When Qt Quick 2 was made available with the release of Qt 5.0, it came with the limitation that support for OpenGL (ES) 2.0 or higher was required.  The assumption was that moving forward OpenGL would continue its trajectory to be the hardware acceleration API of choice for both desktop, mobile and embedded development. Fast forward a couple years down the road to today, and the graphics acceleration story has gotten more complicated.  One assumption we made was that the price of embedded hardware with OpenGL GPUs would continue to drop and they would be ubiquitous.  This is true, but at the same time there are still embedded devices available without OpenGL-capable GPUs where customers continue to wish to deploy Qt Quick applications.  To remedy this we released the Qt Quick 2D Renderer as separate plugin for Qt Quick in Qt 5.4.

At the same time it turned out that Qt Quick applications deployed on a wide range of machines including older systems often have issues with OpenGL due to missing or unavailable drivers, on Windows in particular. Around Qt 5.4 the situation got improved with the ability to dynamically choose between OpenGL proper, ANGLE, or a software OpenGL rasterizer. However, this does not solve all the problems and full-blown software rasterizers are clearly not an option for low-end hardware, in particular in the embedded space. All this left us with the question of why not focus more on the platforms’ native, potentially better supported APIs (for example, Direct3D), and why not improve and integrate the 2D Renderer closer with the rest of the Qt Quick instead of keeping it a separate module with a somewhat arcane installation process.

Come other APIs

Meanwhile, the number of available graphics hardware APIs has increased since the release of Qt Quick 2. Now rather than the easy to understand Direct3D vs OpenGL choice, there is a new generation of lower level graphics APIs available: Vulkan, Metal, and Direct3D 12. So for Qt 5.8 we decided to explore how we can make Qt Quick more future proof, as introduced in this previous post.

Modularization

The main goal for the ScenegraphNG project was to modularize the Qt Quick Scene graph API and remove the OpenGL dependencies in the renderer.  By removing the strong bindings to OpenGL and enhancing the scenegraph adaptation layer it is now possible to implement additional rendering backends either built-in to Qt Quick itself or deployed as dynamically loaded plugins. OpenGL will still be the default backend with full compatibility for all existing Qt Quick code. The changes are not just about plugins and moving code around, however. Some internal aspects of the scenegraph, for instance the material system, exhibited a very strong OpenGL coupling which could not be worked around in a 100% compatible manner when it comes to the public APIs. Therefore some public scenegraph utility APIs got deprecated and a few new ones got introduced. At the time of writing work is still underway to modularize and port some additional components, like the sprite and particle systems, to the new architecture.

To prove that the changes form a solid foundation for future backends, Qt 5.8 introduces an experimental Qt Quick backend for Direct3D 12 on Windows 10 (both traditional Win32 and UWP applications). In the future it will naturally be possible to create a Vulkan backend as well, if it is deemed beneficial. Note that all this has nothing to do with the approaches for integrating custom rendering into QWidget-based or plain QWindow applications. There adding Vulkan or D3D12 instead of OpenGL is possible already today with the existing Qt releases, see for instance here and here.

Qt Quick 2D Renderer, integrated

The Qt Quick 2D Renderer was the first non-OpenGL renderer, but when released, it lived outside of the qtdeclarative code base (which contains the QtQml and QtQuick modules) and carried a commercial-only license. In Qt 5.7 the Qt Quick 2D Renderer was made available under GPLv3, but still as a separate plugin with the OpenGL requirement inherited from Qt Quick itself. In practice this got solved by building Qt against dummy libGLESv2 library, but this was neither nice nor desirable long-term. With Qt 5.8 the Qt Quick 2D renderer is merged into qtdeclarative as the built-in software rendering backend for the Qt Quick SceneGraph. The code has also been relicensed to have the same licenses as QtDeclarative. This also means that stand-alone 2D renderer plugin is no longer under development and the qtdeclarative-render2d repository will become obsolete in the future.

Supercharging the 2D Renderer: Partial updates

The 2D Renderer, which is now referred to mostly as the software backend (or renderer or adaptation), is getting one huge new feature that was not present in the previous standalone versions: partial updates. Previously it would render the entire scene every frame from front to back, which meant that a small animation in a complicated UI could be very expensive CPU-wise, especially when moving towards higher screen resolutions. Now with 5.8 the software backend is capable of only rendering what has changed between two frames, so for example if you have a blinking cursor in a text box, only the cursor and area under the cursor will be rendered and copied to the window surface, not unlike how the traditional QWidgets would operate. A huge performance improvement for any platform using the software backend.

QQuickWidget with the 2D Renderer

Another big feature that the new software backend introduces with Qt 5.8 is support for QQuickWidget. The Qt Quick 2D Renderer was not available for use in combination with QQuickWidget, which made it impossible for apps like Qt Creator to fall back to using the software renderer. Now because of the software renderer’s closer integration with QtDeclarative it was possible to enable support for the software renderer with QQuickWidget. This means that applications using simple Qt Quick scenes without effects and heavy animation can use the software backend in combination with QQuickWidget and thus avoid potential issues when deploying onto older systems (think the OpenGL driver hassle on Windows, the trouble with remoting and X forwarding, etc.). It is important to note that not all types of scenes will perform as well with software as they do with OpenGL (think scrolling larger areas for instance) so the decision has to be made after investigating both options.

No OpenGL at all? No problem.

One big limitation of the Qt Quick 2D Renderer plugin was that in order to build QtDeclarative, you still had to have OpenGL headers and libraries available. So on devices that did not have OpenGL available you had to use provided “dummy” libraries and headers to trick Qt into building QtDeclarative and then enforce your developers not to call any code that could call into OpenGL. This always felt like a hack, but with the hard requirement in QtDeclarative there was no better options available. Until now. In Qt 5.8 this is not an issue because QtDeclarative can now be built without OpenGL. In this case the software renderer becomes the default backend instead of OpenGL. So whenever Qt is configured with -no-opengl or the development environment (sysroot) lacks OpenGL headers and libraries, the QtQuick module is no longer skipped. In 5.8 it will build just fine and default to the software backend.

Switching between backends

Now that there are multiple backends that can render Qt Quick we also needed to provide a way to switch between which API is used. The approach Qt 5.8 takes mirrors how QPA platform plugins or the OpenGL implementation on Windows are handled: the Qt Quick backend can be changed on a per-process basis during application startup. Once the first QQuickWindow, QQuickView, or QQuickWidget is constructed it will not be possible to change it anymore.

To specify the backend to use, either set the environment variable QT_QUICK_BACKEND (also known as QMLSCENE_DEVICE that is inherited from previous versions) or use the C++ API of the static functions QQuickWindow provides. When no request is made, a sensible default will be used. This is currently the OpenGL backend, except in Qt builds that have OpenGL support completely disabled.

As an example, let’s force the software backend in our application:

int main(int argc, char **argv)
{
    // Force the software backend always.
    QQuickWindow::setSceneGraphBackend(QSGRendererInterface::Software);
    QGuiApplication app(argc, argv);
    QQuickView view;
    ...
}

Or launch our application with the D3D12 backend instead of the default OpenGL (or software):

C:\MyCoolApp>set QT_QUICK_BACKEND=d3d12
C:\MyCoolApp>debug\MyCoolApp.exe

To verify what is happening during startup, set the environment variable QSG_INFO to 1 or enable the logging category qt.scenegraph.general. This will lead to printing a number of helpful log messages to the debug or console output, depending on the type of the application. To monitor the debug output, either run the application from Qt Creator or use a tool like DebugView.

With an updated version of the Qt 5 Cinematic Experience demo the result is something like this:

Qt 5 Cinematic Experience demo app running on Direct3D 12

Qt 5 Cinematic Experience demo application running on Direct3D 12

Everything in the scene is there, including the ShaderEffect items that provide a HLSL version of their shaders. Unsupported features, like particles, are gracefully ignored when running with such a backend.

Now what happens if the same application gets launched with QT_QUICK_BACKEND=software?

Qt5 Cinematic Experience demo running on the Software backend

Qt5 Cinematic Experience demo application running on the Software backend

Not bad. We lost the shader effects as well, but other than that the application is fully functional. And all this without relying on a software OpenGL rasterizer or other extra dependencies. No small feat for a framework that started out as a strictly OpenGL-based scene graph.

That’s it for part one. All this is only half of the story – stay tuned for part two where are going to take a look at the new Direct3D 12 backend and what the multi-backend Qt Quick story means for applications using advanced concepts like custom Quick items.

The post The Qt Quick Graphics Stack in Qt 5.8 appeared first on Qt Blog.

Embedded Systems Are the Backbone of IoT, but It’s Software That Brings It All Together

$
0
0

Smoking hot terms like Big Data and the Internet of Things or “IoT” have taken their place in conventional business lingo, and it’s practically impossible to avoid these terms — everyone has recognized what developers have seen for many years. New applications for your products, new opportunities for your offering, new customer areas are emerging, and the time to re-think how you apply connectivity, mash-ups and various sensors is going mainstream. As the business potential has started to materialize, we see that the ecosystem around IoT begins to intensify and expand, strengthening the backbone of IoT, as it shifts into high gear.

Qt Top 5 Considerations IoT infographicYou could argue that the Internet of Things is simply the connected embedded system re-coined. These systems are already around us and machine-to-machine (M2M) systems have been chatting to each other for decades. But in addition to just the technical capabilities between embedded devices, IoT also includes the aspect of The Omnipresent Cloud and mobile client access, shifting the way we use these connected embedded systems. And that then enables all the new IoT innovations, but also affects how we need to design these systems, especially from software perspective: Instead of creating a self-contained embedded device with an online connection, we are designing complex and extensible systems with connected sensors, embedded devices, a cloud back-end and mobile clients. *Poof* Embedded software design just became exponentially more complex.

As computers (and sensors) get smaller, smarter and connected, our everyday objects, from clothing to lavatories to cars, get more intelligent. Although hardware has center stage, it’s time to start looking at the software that will bring it all together.

Embedded Development Can Be Modern, Too 

In the past ten years, there has been a tremendous leap in how software is developed. Modern software development in general seems to be about finding new ways of working even more agile, adopting new techniques quickly, abandoning non-working ones, moving rapidly forward with continuously deployed changes and near-realtime iterations in a harmonious telepathy between the customer and a self-guiding and proactive development team.

Modern software development is naturally awesome, but unfortunately, in embedded software development one can too rarely apply any of the stuff the cool kids in the web/mobile world are hyping about. Because of industry-related verification/certification requirements and especially the technical limitations of embedded cross-compilation workflow, I still hear waterfalls in the distance. At the same time, when we’re supposed to create these complex and innovative IoT things with modern touch UIs, we can’t afford to have development cycles that take weeks for each iteration of a simple UI tweak. The markets need to be reached faster! This is what we want to change with Qt—we want to make embedded development as seamless as desktop or mobile development. We want to provide one technology for all embedded and mobile platforms — and enable rapid deployment cycles for the whole IoT system.

Qt libraries give you various UI approaches for creating a unified UX between your embedded and mobile devices. In addition, there are plenty of high-level Qt APIs for creating the engine of your IoT gateways: eg. Bluetooth LE for sensor communication and built-in JSON support for cloud communication. Qt Creator IDE works on all platforms, supports direct deployment to desktop, embedded and mobile targets and includes all the tools for designing, developing, debugging, profiling and analyzing your code. You can do rapid prototyping on your laptop and push the build to your embedded hardware or mobile device to see the changes there.

  • Support multiple devices with or without screens
  • Leverage your core communication libraries between a desktop interface and a mobile gadget
  • Share code with other IoT developers building different parts of the ecosystem

To learn why having an embedded tool that has powerful UX capabilities can make the difference for your business: Read the whitepaper “Building the Internet of Things and How Qt Can Help”. 


The post Embedded Systems Are the Backbone of IoT, but It’s Software That Brings It All Together appeared first on Qt Blog.

Fast-Booting Qt Devices, Part 4: Hardware Matters

$
0
0

Welcome back!

A while ago, I posted three parts of Fast-Booting Qt Devices blog post series where we showcased 1,5 second boot-time, optimized the Qt application and finally showed you how we optimized the entire Linux stack. Today, we will show you that hardware selection and hardware architecture in general can have a big impact on the actual startup time even when using the same CPU. To demonstrate this, we have two boards with NXP i.MX6 Quadcore CPU. One is a board geared towards software development, and the other is a system-on-module board aimed to be used in the production as well.

So, let’s a have a small Battle of the Boards! :)

On the left side, we have the NXP SABRE  i.MX 6 Quad Development Board:

  • NXP i.MX 6 Quadcore processor, running at 1GHz
  • 1GB DDR3 RAM
  • 8GB eMMC

On the right, we have Toradex Apalis i.MX 6 Computer on Module:

  • NXP i.MX 6 Quad core processor, running at 1GHz
  • 1GB DDR3 RAM
  • 4GB eMMC

Both boards are running exactly the same Qt Cluster demo, kernel configurations and u-boot.

Toradex Computer on Module is a clear winner with 19% (294 ms) faster startup time. Our earlier fast-boot example with the NXP SABRE resulted in a very good 1560 ms from power up to display of the first full screen Qt Quick frame. Now, with the Toradex board, we got an even faster 1266 ms.

Where does the difference come from?

  • Powering up of the board is faster with Toradex module
  • Kernel is able to access eMMC earlier resulting into a faster kernel startup time

So, when designing your embedded devices, remember that hardware selection does matter too. If you need to reach blazing fast startup time, it certainly helps to have fast memory and memory bus, well optimized bootloader and kernel, as well as of course a powerful chip that can quickly crunch through the libraries you need to load. The rest is then up to your software–even with the optimized hardware you can ruin your boot-up time with a sloppy software design. For those tips, check out the earlier posts in this series.

If you are interested in hearing more, I will be talking about fast-boot of Qt based devices at the Qt World Summit in San Francisco, October 18-20. We are looking forwards to seeing you there, and hearing your feedback!


The post Fast-Booting Qt Devices, Part 4: Hardware Matters appeared first on Qt Blog.


Creating Certified Medical Devices with Qt

$
0
0

Many modern medical devices provide a graphical interface to the user. In dialysis machines, for example, touch screen interfaces to set up the treatment parameters and to monitor the treatment progress are commonplace. Qt is a viable technical solution to implement those interfaces, so it is used in quite a number of medical devices.

When designing and implementing a medical device, however, you have to do more than to find a good technical solution. You have to analyze the risks associated with your device, and you have to make sure that your system design and development is appropriate for that risk. That is not an easy task, but there are laws, regulations and standards that provide guidance on the required development process for medical device software. Important guidance documents are:

If you develop software for a medical device that will be marketed in the EU and the US, you will have to follow those guidelines. They are mainly concerned with the process of designing, implementing, verifying and testing your own device software. But they also influence the use of third-party software like Qt in your device. If your third-party software, or SOUP (“Software of Unknown Provenance” in terms of IEC 62304), may contribute to a hazardous situation, i.e. might lead to harm to the patient, you have to minimize that contribution and make sure that the chosen third-party software is appropriate.

If we continue the example of a dialysis machine, one of the functions of the therapy – besides cleaning the blood of the patient – is to remove excess water from the body of the patient. Depending on the physical condition of the patient, up to four liters of water may be removed in a typical therapy session. But that is just the maximum amount, a patient might need less water removal, or none at all. The problem is that you have to enter the right amount of water to remove via the user interface, and it is critical that you do not remove more than that amount, as removing too much water might lead to a circulatory collapse and might severely harm the patient. Input of safety-critical values is a typical critical user interface function in medical devices, as well as the output of safety-critical values, e.g. the oxygen saturation of a patient’s blood.

Another critical user interface function that is common in medical devices is alarms. Imagine that during a dialysis therapy, the device detects that there is an air bubble in the blood line (which, when infused back into the patient, might lead to embolism). What the device probably should do is to stop the therapy, sound an alarm sound and display a visual warning to the operator of the device to take appropriate actions.

Obviously, if one of those functions fail to work correctly, the patient may be harmed. Now a manufacturer might ask some basic questions:

  • 1. What can we do to prevent the harm to the patient?
  • 2. May we use Qt to implement those safety-critical user interface functions?
  • 3. Do we need a validated toolkit to build a safety-critical user interface?

Let’s start with the first question. It can only be answered by performing a detailed risk analysis. The standard ISO 14971 provides guidance on how to do this. In the example of the air-in-line alarm, we start with the hazard (the air bubble), determine the potential harm (which – in the worst case – is the death of the patient) and try to estimate the probability of the harm (for the sake of the example, let’s assume an air bubble once per 24 hours of treatment). If we combine those assumptions and estimates, we will find that the risk (the combination of the severity of the harm and the probability of its occurrence) is not acceptable. Thus we need to do something to reduce the risk. We might decide to add an air-bubble-detector into the system, and to add an alarm function to the user interface. When a bubble is detected, the system stops the therapy and raises the alarm to request the user to take appropriate action.

This is a reasonable first step, but not the end of our analysis. What happens if the alarm is not displayed? This could be caused by a problem with the display driver, or a failing LCD backlight, or by an unexpected failure of the GUI toolkit. A medical device needs to be safe even in the presence of a single fault in the system. So having an alarm system that might fail because of a single reason is not acceptable. Typical devices would therefore add another redundant and diverse alarm mechanism, e.g. a flashing LED that can be activated even when the GUI is not working properly. With this second channel, the alarm can be indicated even with a failure in the GUI or a failure in the LED mechanism. And this is generally considered to be safe. Of course, there is a cost – additional hardware.

There are other examples of diversity in graphical user interfaces: If we display a critical numerical value, we might be concerned that loading the correct font fails. Remember, we have to assume a first fault like a damaged font file. We can add some redundancy and display a bar graph visualizing the numerical value in addition to the number. Even if the numbers are not displayed correctly, the bar graph will present the information to the user. Sometimes you will see an old-fashioned LCD screen next to a touch screen on a medical device. This is a secure (if not pretty) way to add redundancy to the display system. The important point is that the resulting risk, even with a failure in the GUI, has to be acceptable.

Now we can tackle the second question: May we use Qt for the GUI of a safety critical medical device? Principally, the choice of technologies is up to the system designer. None of the standards will tell you to choose one toolkit over the other. The manufacturer of the medical device needs to make sure that it is safe, according to what has already been mentioned. But in addition to that, the IEC 62304 and the OTS require that we make a conscious decision about the choice third-party software or SOUP. In addition to the mentioned risk analysis, we need to make sure that:

  • The toolkit provides the functionality and performance that we depend on
  • The device provides the support necessary to operate the toolkit within its specification
  • The toolkit performs as required for our system

So a device manufacturer will have to provide evidence of these claims, i.e. will have to document the requirements to Qt, analyze and document the requirements imposed by Qt on the system and you will have to perform some degree of testing in the system to prove the requirements are met. And the manufacturer needs to set up a monitoring process to regularly check the bug list of the third-party software component and to assess if any new bugs impose additional risks to the patients. All of these points might be subject to an audit by a notified body or the FDA.

Very often the following question will be asked: Where can we buy a GUI toolkit that has already been validated to be suitable for use in safety-critical medical devices? Unfortunately, there is no such thing as a pre-validation for medical devices. As the starting point of third-party component validation is focused on the risk analysis, only the manufacturer of the device can do the qualification, because only the manufacturer can identify the risks. Therefore, IEC 62304 and the FDA regulations do not define a certification process for third-party software (SOUP). The best way a vendor can support a medical device manufacturer therefore is by providing good documentation of its development process and proof of internal testing, which allows the manufacturer to asses if it is appropriate for the planned application.

If you use a commercial license of Qt, contact The Qt Company and request a description of the QA practices and test report of the Qt version you intent to use. These documents are readily available and support your qualification effort.

To summarize, if you plan to use Qt for safety-critical functions in a medical device, make sure to:

  • 1. Identify all risks that might be caused by failures of the user interface
  • 2. Try to mitigate those risks by means outside the user interface, e.g. by redundant inputs and outputs
  • 3. Build redundancy into the user-interface itself to protect against single-fault failures
  • 4. Carefully select the software components you use to implement the user interface
  • 5. Document the rationale for your decision that Qt is appropriate for your device so it can be reviewed by external auditors

If you follow those steps, you will be able to design your device with a modern user interface, and still meet all the safety requirements.

About the Blog Post Author:

Matthias Hölzer-Klüpfel is an independent consultant, trainer and contractor concerned with development processes and project management for medical device software. He co-founded the association “International Certified Professional for Medical Software Board e.V.” which provides the foundation for a certified education program for medical device software development.

You can reach Matthias via matthias@hoelzer-kluepfel.de if you have any further questions.

Earlier Blog Posts about Functional Safety with Qt:

If you are interested in hearing more about Functional Safety, there is a talk at Qt World Summit by Tuukka Turunen about ‘Creating Functional Safety Certified Systems with Qt’.

The post Creating Certified Medical Devices with Qt appeared first on Qt Blog.

Internet of Things: Why Tools Matter?

$
0
0

With the Internet of Things (IoT) transformation, it’s obvious that the amount of connected devices in the world is increasing rapidly. Everywhere around our daily lives we all use more and more of them. In addition to being connected, more devices get equipped with a touch screen and a graphical user interface. We have all seen this around us and many Qt users are also deeply involved in creating software for these devices. To bring in some numbers, the Gartner group has estimated that the amount of connected devices will grow to a whopping 20.7 billion by 2020 (and some predict even higher growth, up to 30 billion devices).

Not only is the number of devices growing, but the complexity and amount of software is also increasing rapidly. For example, today’s passenger car can have over 100M lines of code, and this is expected to triple in the future as the functionality of automotive software increases. Cars are on the high side of complexity, but even the simplest connected devices need a lot of software to be able to handle the requirements for connectivity, security and to match the growing usability expectations of consumers.

Here is how the estimated growth of connected devices looks in a line graph:

iotdevices

What is inside these devices? What kind of software drives the connected devices? What kind of skills are needed to build these? It is estimated that 95% of today’s embedded systems are created with C/C++, and that this is not significantly changing in the foreseeable future. Then, on the other hand, according to a study there were 4.4M C++ developers and 1,9M C developers in 2015 in the World. An older study by IDC from 2001, shows that the number of C++ developers was estimated to be 3M back then. This means the number of C++ developers has been growing steadily around 3% per year and is expected to continue with a similar trend – or at least within a similar range.

So, a visualization of C++ developer growth provides the following graph:

cppdevelopers
The estimated number of devices, most of which will be done with C and C++, is already growing with much faster pace than the amount of C++ developers and the growth is expected to get even higher. Due to the increased complexity of functionality, the amount of software needed in the devices is also growing. Although some of the new devices will be very simple in functionality, on average the devices get more and more complex to meet consumers’ requirements.

Now, comparing these two trends together gives us an interesting paradox: How can the few millions of C++ developers match the requirement to build the dozens of billions of connected devices in the future?

Putting these two graphs together, we can clearly visualize the paradox (and a possible solution):

developes_vs_iotdevices


So how does this add up? Do we expect a 2020 C++ developer to write 20 times more code than a decade ago? That does not work. Even if all the C++ developers would focus into embedded, with no one creating and maintaining software for desktop and mobile applications, there still may not be enough developers. C++ developers can’t be easily trained from other professionals – programming is a skill that takes years to learn and not everyone can master.

So, Something needs to be done to facilitate two things: Enabling the C++ developers to be more productive and also helping the non-C++ developers to create the devices.

Therefore, the approach for creating embedded software needs to be adapted to the new situation. The only way to cope with the growth is to have good tools for embedded device creation and to increase the reuse of software. It is no longer viable to re-invent the wheel for each product – the scarce programming resources have to be targeted into differentiating functionality. Organizations will have to prioritize and focus into where they add value the most – anything that can be reused should not be created inhouse. Using tools and frameworks like Qt is the only viable approach to create the envisioned devices. The old Qt tagline: “Code less. Create more. Deploy Everywhere” is more relevant today than it has ever been. Qt has a solid track record from embedded, desktop and mobile development, making the creation of applications easy in any platform and also across multiple platforms.

It is likely that even reuse of software assets is not enough. It is also necessary to increase productivity of the C++ developers and to extend the personnel creating the software beyond the ones who master C++. Using the widely renowned and well-documented Qt API functionality and excellent development tools, C++ developers are more productive than before. Qt also provides an easy-to-use declarative QML language and visual design tools for user interface creation, growing the amount of people who can create software for embedded beyond the C++ developers. There are already over million developers familiar with Qt, and new developers across the world are taking it into use every day.

With the QML language, visual UI design tools and functionality for embedded devices does not mandate C++ skills for every developer in the team. It will still be necessary to have core C/C++ developers when making embedded devices, but others can help as well. Using Qt allows both non-C++ developers to create some of the needed functionality and the C++ developers to be more productive.

To increase developer productivity and to extend the developer base, Qt offers otherwise unseen ease of embedded development. Qt provides many of the common development boards supported out of the box, one click deployment to target device, built-in device emulator, on target debugger, performance analyzer, visual UI designer and many more tools in the integrated development environment. With the integrated tools and extensive API functionality, developing with Qt is unlike traditional embedded development. Qt makes embedded development almost as easy as creation of desktop or mobile applications.

The future is written with Qt.

To learn more about the latest developments of Qt, join us at the Qt World Summit October 18-20th 2016 in San Francisco, USA.

We’re also hosting an online panel discussion with industry experts around IoT and software in general September 27th. Register today for the webinar for an interesting fireside chat!

The post Internet of Things: Why Tools Matter? appeared first on Qt Blog.

Qt Graphics with Multiple Displays on Embedded Linux

$
0
0

Creating devices with multiple screens is not new to Qt. Those using Qt for Embedded in the Qt 4 times may remember configuration steps like this. The story got significantly more complicated with Qt 5’s focus on hardware accelerated rendering, so now it is time to take a look at where we are today with the upcoming Qt 5.8.

Windowing System Options on Embedded

The most common ways to run Qt applications on an embedded board with accelerated graphics (typically EGL + OpenGL ES) are the following:

  • eglfs on top of fbdev or a proprietary compositor API or Kernel Modesetting + the Direct Rendering Manager
  • Wayland: Weston or a compositor implemented with the Qt Wayland Compositor framework + one or more Qt client applications
  • X11: Qt applications here run with the same xcb platform plugin that is used in a typical desktop Linux setup

We are now going to take a look at the status of eglfs because this is the most common option, and because some of the other approaches rely on it as well.

Eglfs Backends and Support Levels

eglfs has a number of backends for various devices and stacks. For each of these the level of support for multiple screens falls into one of the three following categories:

  • [1] Output management is available.
  • [2] Qt applications can choose at launch time which single screen to output to, but apart from this static setting no other configuration option is provided.
  • [3] No output-related configuration is provided.

Note that some of these, in particular [2], may require additional kernel configuration via a video argument or similar. This is out of Qt’s domain.

Now let’s look at the available backends and the level of multi-display support for each:

  • KMS/DRM with GBM buffers (Mesa (e.g. Intel) or modern PowerVR and some other systems) [1]
  • KMS/DRM with EGLDevice/EGLOutput/EGLStream (NVIDIA) [1]
  • Vivante fbdev (NXP i.MX6) [2]
  • Broadcom Dispmanx (Raspberry Pi) [2]
  • Mali fbdev (ODROID and others) [3]
  • (X11 fullscreen window – targeted mainly for testing and development) [3]

Unsurprisingly, it is the backends using the DRM framework that come out best. This is as expected, since there we have a proper connector, encoder and CRTC enumeration API, whereas others have to resort to vendor-specific solutions that are often a lot more limited.

We will now focus on the two DRM-based backends.

Short History of KMS/DRM in Qt

Qt 5.0 – 5.4

Qt 5 featured a kms platform plugin right from the beginning. This was fairly usable, but limited in features and was seen more as a proof of concept. Therefore, with the improvements in eglfs, it became clear that a more unified approach was necessary. Hence the introduction of the eglfs_kms backend for eglfs in Qt 5.5.

Qt 5.5

While originally developed for a PowerVR-based embedded system, the new backend proved immensely useful for all Linux systems running with Mesa, the open-source stack, in particular on Intel hardware. It also featured a plane-based mouse cursor, with basic support for multiple screens added soon afterwards.

Qt 5.6

With the rise of NVIDIA’s somewhat different approach to buffer management – see this presentation for an introduction – an additional backend had to be introduced. This is called eglfs_kms_egldevice and allows running on the automotive-oriented Jetson Pro, DRIVE CX and DRIVE PX systems.

The initial version of the plugin was standalone and independent from the existing DRM code. This led to certain deficiencies, most notably the lack of multi-display support.

Qt 5.7

Fortunately, these problems got addressed pretty soon. Qt 5.7 features proper code sharing between the backends, making most of the multi-display support and its JSON-based configuration system available to the EGLStream-based backend as well.

Meanwhile the GBM-based backend got a number of fixes, in particular related to the hardware mouse cursor and the virtual desktop.

Qt 5.8

The upcoming release features two important improvements: it closes the gaps between the GBM and EGLStream backends and introduces support for advanced configurability. The former covers mainly the handling of the virtual desktop and the default, non-plane-based OpenGL mouse cursor which was unable to “move” between screens in previous releases.

The documentation is already browsable at the doc snapshots page.

Besides the ability to specify the virtual desktop layout, the introduction of the touchDevice property is particularly important when building systems where one or more of the screens is made interactive via a touchscreen. Let’s take a quick look at this.

Touch Input

Let’s say you are creating digital instrument clusters with Qt, with multiple touch-enabled displays involved. Given that the touchscreens report absolute coordinates in their events, how can Qt tell which screen’s virtual geometry the event should be translated to? Well, on its own it cannot.

From Qt 5.8 it will be possible to help out the framework. By setting QT_LOGGING_RULES=qt.qpa.*=true we enable logging which lets us figure out the touchscreen’s device node.  We can then create a little JSON configuration file on the device:

{
    "device": "drm-nvdc",
    "outputs": [
      {
        "name": "HDMI1",
        "touchDevice": "/dev/input/event5",
      }
    ]
}

This will come handy in any case since configuration of screen resolution, virtual desktop layout, etc. all happens in the same file.

Now, when a Qt application is launched with the QT_QPA_EGLFS_KMS_CONFIG environment variable pointing to our file, Qt will know that the display connected to the first HDMI port has a touchscreen as well that shows up at /dev/input/event5. Hence any touch event from that device will get correctly associated with the screen in question.

Qt on the DRIVE CX

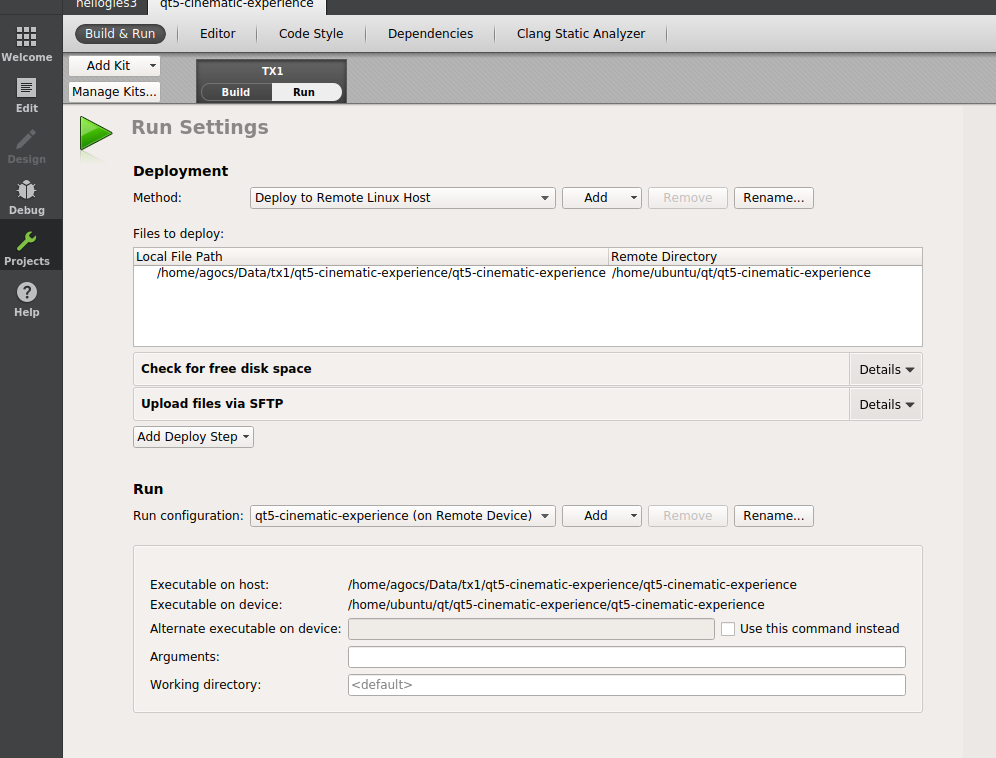
Let’s see something in action. In the following example we will use an NVIDIA DRIVE CX board, with two monitors connected via HDMI and DisplayPort. The software stack is the default Vibrante Linux image, with Qt 5.8 deployed on top. Qt applications run with the eglfs platform plugin and its eglfs_kms_egldevice backend.

drivecx_small

Our little test environment looks like this:

disp_both

This already looks impressive, and not just because we found such good use for the Windows 95, MFC, ActiveX and COM books hanging around in the office from previous decades. The two monitors on the sides are showing a Qt Quick application that apparently picks up both screens automatically and can drive both at the same time. Excellent.

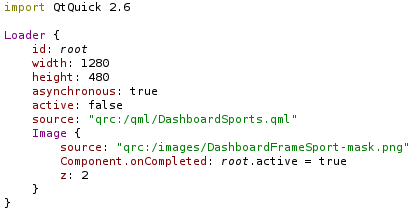
The application we are using is available here. It follows the standard multi-display application model for embedded (eglfs): creating a dedicated QQuickWindow (or QQuickView) on each of the available screens. For an example of this, check the code in the github repository, or take a look at the documentation pages that also have example code snippets.

A closer look reveals our desktop configuration:

disp2

The gray MouseArea is used to test mouse and touch input handling. Hooking up a USB touch-enabled display immediately reveals the problems of pre-5.8 Qt versions: touching that area would only deliver events to it when the screen happened to be the first one. In Qt 5.8 this is can now be handled as described above.

disp1

It is important to understand the screen geometry concepts in QScreen. When the screens form a virtual desktop (which is the default for eglfs), the interpretation is the following:

  • geometry() – the screen’s position and size in the virtual desktop
  • availableGeometry() – without a windowing system this is the same as geometry()
  • virtualGeometry() – the geometry of the entire virtual desktop to which the screen belongs
  • availableVirtualGeometry() – same as virtualGeometry()
  • virtualSiblings() – the list of all screens belonging to the same virtual desktop

Configuration

How does the virtual desktop get formed? It may seem fairly random by default. In fact it simply follows the order DRM connectors are reported in. This is often not ideal. Fortunately, it is configurable starting with Qt 5.8. For instance, to ensure that the monitor on the first HDMI port gets a top-left position of (0, 0), we could add something like the following to the configuration file specified in QT_QPA_EGLFS_KMS_CONFIG:

{
  "device": "drm-nvdc",
  "outputs": [
    {
      "name": "HDMI1",
      "virtualIndex": 0
    },
    {
      "name": "DP1",
      "virtualIndex": 1
    }
  ]
}

If we wanted to create a vertical layout instead of horizontal (think an instrument cluster demo with three or more screens stacked under each other), we could have added:

{
  "device": "drm-nvdc",
  "virtualDesktopLayout": "vertical",
  ...
}

More complex layouts, for example a T-shaped setup with 4 screens, are also possible via the virtualPos property:

{
  ...
  "outputs": [
    { "name": "HDMI1", "virtualIndex": 0 },
    { "name": "HDMI2", "virtualIndex": 1 },
    { "name": "DP1", "virtualIndex": 2 },
    { "name": "DP2", "virtualPos": "1920, 1080" }
  ]
}

Here the fourth screen’s virtual position is specified explicitly.

In addition to virtualIndex and virtualPos, the other commonly used properties are mode, physicalWidth and physicalHeight. mode sets the desired mode for the screen and is typically a resolution, e.g. “1920×1080”, but can also be set to “off”, “current”, or “preferred” (which is the default).

For example:

{
  "device": "drm-nvdc",
  "outputs": [
    {
      "name": "HDMI1",
      "mode": "1024x768"
    },
    {
      "name": "DP1",
      "mode": "off"
    }
  ]
}

The physical sizes of the displays become quite important when working with text and components from Qt Quick Controls. This is because these base size calculations on the logical DPI that is in turn based on the physical width and height. In desktop environments queries for these sizes usually work just fine, so no further actions are needed. On embedded however, it has often been necessary to provide the sizes in millimeters via the environment variables QT_QPA_EGLFS_PHYSICAL_WIDTH and QT_QPA_EGLFS_PHYSICAL_HEIGHT. This is not suitable in a multi-display environment, and therefore Qt 5.8 introduces an alternative: the physicalWidth and physicalHeight properties (values are in millimeters) in the JSON configuration file. As witnessed in the second screenshot above, the physical sizes did not get reported correctly in our demo setup. This can be corrected, as it was done for the monitor in the first screenshot, by doing something like:

{
  "device": "drm-nvdc",
  "outputs": [
    {
      "name": "HDMI1",
      "physicalWidth": 531,
      "physicalHeight": 298
    },
    ...
  ]
}

As always, enabling logging can be a tremendous help for troubleshooting. There are a number of logging categories for eglfs, its backends and input, so the easiest is often to enable everything under qt.qpa by doing export QT_LOGGING_RULES=qt.qpa.*=true before starting a Qt application.

What About Wayland?

What about systems using multiple GUI processes and compositing them via a Qt-based Wayland compositor? Given that the compositor application still needs a platform plugin to run with, and that is typically eglfs, everything described above applies to most Wayland-based systems as well.

Once the displays are configured correctly, the compositor can create multiple QQuickWindow instances (QML scenes) targeting each of the connected screens. These can then be assigned to the corresponding WaylandOutput items. Check the multi output example for a simple compositor with multiple outputs.

The rest, meaning how the client applications’ windows are placed, perhaps using the scenes on the different displays as one big virtual scene, moving client “windows” between screens, etc., are all in QtWayland’s domain.

What’s Missing and Future Plans

The QML side of screen management could benefit from some minor improvements: unlike C++, where QScreen, QWindow and QWindow::setScreen() are first class citizens, Qt Quick has currently no simple way to associate a Window with a QScreen, mainly because QScreen instances are only partially exposed to the QML world. While this is not fatal and can be worked around with some C++ code, as usual, the story here will have to be enhanced a bit.

Another missing feature is the ability to connect and disconnect screens at runtime. Currently such hotplugging is not supported by any of the backends. It is worth noting that with embedded systems the urgency is probably a lot lower than with ordinary desktop PCs or laptops, since the need to change screens in such a manner is less common. Nevertheless this is something that is on the roadmap for future releases.

That’s it for now. As we know, more screens are better than one, so why not just let Qt power them all?

The post Qt Graphics with Multiple Displays on Embedded Linux appeared first on Qt Blog.

Customizable vector maps with the Mapbox Qt SDK

$
0
0

Mapbox is a mapping platform that makes it easy to integrate location into any mobile and online application. We are pleased to showcase the Mapbox Qt SDK as a target platform for our open source vector maps rendering engine. Our Qt SDK is a key component in Mapbox Drive, the first lane guidance map designed for car companies to control the in-car experience. The Qt SDK also brings high quality, OpenGL accelerated and customizable maps to Qt native and QtQuick.

QML: Properties QML: Runtime style
QMLProperties QMLRuntimeStyle

The combination of Qt and Yocto is perfect for bringing our maps to a whole series of embedded devices, ranging from professional NVIDIA and i.MX6 based boards to the popular Raspberry Pi 3.

As part of our Mapbox Qt SDK, we expose Mapbox GL to Qt in two separate APIs:

  • QMapboxGL – implements a C++03x-conformant API that has been tested from Qt 4.7 onwards (Travis CI currently builds it using both Qt 4 and Qt 5).
  • QQuickMapboxGL – implements a Qt Quick (QML) item that can be added to a scene. Because QQuickFramebufferObjecthas been added in Qt version 5.2, we support this API from this version onwards. The QML item interface matches the Qt Map QML type almost entirely, making it easy to exchange from the upstream solution.

QMapboxGL and QQuickMapboxGL solve different problems. The former is backwards-compatible with previous versions of Qt and is easily integrated into pure C++ environments. The latter takes advantage of Qt Quick’s modern user interface technology, and is the perfect tool for adding navigation maps on embedded platforms. So far we have been testing our code on Linux and macOS desktops, as well as on Linux based embedded devices.

Mapbox is on a joint effort with the Qt Company to make the Mapbox Qt SDK also available through the official Qt Location module – we are aligning APIs to make sure Mapbox-specific features like runtime styles are available.

QQuickMapboxGL API matches Qt’s Map QML Type, as you can see from the example below:

import QtPositioning 5.0 
import QtQuick 2.0 
import QtQuick.Controls 1.0 

import QQuickMapboxGL 1.0 

ApplicationWindow {
    width: 640 
    height: 480 
    visible: true

    QQuickMapboxGL {
        anchors.fill: parent

        parameters: [
            MapParameter {
                property var type: "style"
                property var url: "mapbox://styles/mapbox/streets-v9"
            },
        ]

        center: QtPositioning.coordinate(60.170448, 24.942046) // Helsinki
        zoomLevel: 14
    }   
}

Mapbox Qt SDK is currently in beta stage. We’re continuously adding new features and improving documentation is one of our immediate goals. Your patches and ideas are always welcome!

We also invite you to join us next month at Qt World Summit 2016 and contribute to Mapbox on GitHub.

The post Customizable vector maps with the Mapbox Qt SDK appeared first on Qt Blog.

Qt on the NVIDIA Jetson TX1 – Device Creation Style

$
0
0

NVIDIA’s Jetson line of development platforms is not new to Qt; a while ago we already talked about how to utilize OpenGL and CUDA in Qt applications on the Jetson TK1. Since then, most of Qt’s focus has been on the bigger brothers, namely the automotive-oriented DRIVE CX and PX systems. However, this does not mean that the more affordable and publicly available Jetson TX1 devkits are left behind. In this post we are going to take a look how to get started with the latest Qt versions in a proper embedded device creation manner, using cross-compilation and remote deployment for both Qt itself and applications.

jetson

The photo above shows our TX1 development board (with a DRIVE CX sitting next to it), hooked up to a 13″ touch-capable display. We are going to use the best-supported, Ubuntu 16.04-based sample root filesystem from Linux for Tegra R24.2, albeit in a bit different manner than what is shown here: instead of going for the default approach based on OpenGL + GLX via the xcb platform plugin, we will instead set up Qt for OpenGL ES + EGL via the eglfs. Our applications will still run on X11, but in fullscreen. Instead of building or developing anything on the device itself, we will follow the standard embedded practice of developing and cross-compiling on a Linux-based host PC.

Why this approach?

  • Fast. While building on target is fully feasible with all the power the TX1 packs, it is still no match for compiling on a desktop machine.
  • By building Qt ourselves we can test the latest version, or even unreleased snapshots from git, not tied to the out-of-date version provided by the distro (5.5).
  • This way the graphics and input device configuration is under control: we are after EGL and GLES, with apps running in fullscreen (good for vsync, see below) and launched remotely, not a desktop-ish, X11-oriented build. We can also exercise the usual embedded input stack for touch/mouse/keyboard/tablet devices, either via Qt’s own evdev code, or libinput.
  • While we are working with X11 for now, the custom builds will allow using other windowing system approaches in the future, once they become available (Wayland, or just DRM+EGLDevice/EGLOutput/EGLStream).
  • Unwanted Qt modules can be skipped: in fact in the below instructions only qtbase, qtdeclarative and qtgraphicaleffects get built.
  • Additionally, with the approach of fine-grained configurability provided by the Qt Lite project, even the must-have modules can be tuned to include only the features that are actually in use.

Setting Up the Toolchain

We will use L4T R24.2, which features a proper 64-bit userspace.

After downloading Tegra210_Linux_R24.2.0_aarch64.tbz2 and Tegra_Linux_Sample-Root-Filesystem_R24.2.0_aarch64.tbz2, follow the instructions to extract, prepare and flash the device.

Verify that the device boots and the X11 desktop with Unity is functional. Additionally, it is strongly recommended to set up the serial console, as shown here. If there is no output on the connected display, which happened sometimes with our test display as well, it could well be an issue with the HDMI EDID queries: if running get-edid on the console shows no results, this is likely the case. Try disconnecting and reconnecting the display while the board is running.

Once the device is ready, we need a toolchain. For instance, get gcc-linaro-5.3.1-2016.05-x86_64_aarch64-linux-gnu.tar.xz from Linaro (no need for the runtime or sysroot packages now).

Now, how do we add more development files into our sysroot? The default system provided by the sample root file system in Linux_for_Tegra/rootfs is a good start, but is not sufficient. On the device, it is easy to install headers and libraries using apt-get. With cross-compilation however, we have to sync them back to the host as well.

First, let’s install some basic dependencies on the device:

sudo apt-get install '.*libxcb.*' libxrender-dev libxi-dev libfontconfig1-dev libudev-dev

Then, a simple option is to use rsync: after installing new -dev packages on the target device, we can just switch to rootfs/usr on the host PC and run the following (replacing the IP address as appropriate):

sudo rsync -e ssh -avz ubuntu@10.9.70.50:/usr/include .
sudo rsync -e ssh -avz ubuntu@10.9.70.50:/usr/lib .

Almost there. There is one more issue: some symbolic links in rootfs/usr/lib/aarch64-linux-gnu are absolute, which is fine when deploying the rootfs onto the device, but pretty bad when using the same tree as the sysroot for cross-compilation. Fix this by running a simple script, for instance this one. This will have to be done every time new libraries are pulled from the target.

Graphics Considerations

By default Qt gets configured for GLX and OpenGL (supporting up to version 4.5 contexts). For EGL and OpenGL ES (up to version 3.2) we need some additional steps first:

The headers are missing by default. Normally we would install packages like libegl1-mesa-dev, however it is likely safer to avoid this and not risk pulling in the Mesa graphics stack, potentially overwriting the NVIDIA proprietary binaries. Run something like the following on the device:

apt-get download libgles2-mesa-dev libegl1-mesa-dev
ar x ...
tar xf data.tar.xz (do this for both)
sudo cp -r EGL GLES2 GLES3 KHR /usr/include

then rsync usr/include back into the sysroot on the host.

Library-wise we are mostly good, except one symlink. Do this on the device in /usr/lib/aarch64-linux-gnu:

sudo ln -s /usr/lib/aarch64-linux-gnu/tegra-egl/libGLESv2.so.2 libGLESv2.so

then sync the libraries back as usual.

Qt can now be configured with -opengl es2. (don’t be misled by “es2”, OpenGL ES 3.0, 3.1 and 3.2 will all be available as well; Qt applications will get version 3.2 contexts automatically due to the backwards compatible nature of OpenGL ES)

Configuring and Building Qt

Assuming our working directory for L4T and the toolchain is $HOME/tx1, check out qtbase into $HOME/tx1/qtbase (e.g. run git clone git://code.qt.io/qt/qtbase.git -b dev – using the dev branch, i.e. what will become Qt 5.9, is highly recommended for now because the TX1 device spec is only present there) and run the following:

./configure
-device linux-jetson-tx1-g++
-device-option CROSS_COMPILE=$HOME/tx1/gcc-linaro-5.3.1-2016.05-x86_64_aarch64-linux-gnu/bin/aarch64-linux-gnu-
-sysroot $HOME/tx1/Linux_for_Tegra/rootfs
-nomake examples
-nomake tests
-prefix /usr/local/qt5
-extprefix $HOME/tx1/qt5
-hostprefix $HOME/tx1/qt5-host
-opengl es2

Note the dash at the end of the CROSS_COMPILE device option. It is a prefix (for aarch64-linux-gnu-gcc and others) so the dash is necessary.

This will be a release build. Add -force-debug-info if debug symbols are needed. Switching to full debug builds is also possible by specifying -debug.

Check the output of configure carefully, paying extra attention to the graphics bits. Below is an extract with an ideal setup:

Qt Gui:
  FreeType ............................... yes
    Using system FreeType ................ yes
  HarfBuzz ............................... yes
    Using system HarfBuzz ................ no
  Fontconfig ............................. yes
  Image formats:
    GIF .................................. yes
    ICO .................................. yes
    JPEG ................................. yes
      Using system libjpeg ............... no
    PNG .................................. yes
      Using system libpng ................ yes
  OpenGL:
    EGL .................................. yes
    Desktop OpenGL ....................... no
    OpenGL ES 2.0 ........................ yes
    OpenGL ES 3.0 ........................ yes
    OpenGL ES 3.1 ........................ yes
  Session Management ..................... yes
Features used by QPA backends:
  evdev .................................. yes
  libinput ............................... no
  mtdev .................................. no
  tslib .................................. no
  xkbcommon-evdev ........................ no
QPA backends:
  DirectFB ............................... no
  EGLFS .................................. yes
  EGLFS details:
    EGLFS i.Mx6 .......................... no
    EGLFS i.Mx6 Wayland .................. no
    EGLFS EGLDevice ...................... yes
    EGLFS GBM ............................ no
    EGLFS Mali ........................... no
    EGLFS Rasberry Pi .................... no
    EGL on X11 ........................... yes
  LinuxFB ................................ yes
  Mir client ............................. no
  X11:
    Using system provided XCB libraries .. yes
    EGL on X11 ........................... yes
    Xinput2 .............................. yes
    XCB XKB .............................. yes
    XLib ................................. yes
    Xrender .............................. yes
    XCB render ........................... yes
    XCB GLX .............................. yes
    XCB Xlib ............................. yes
    Using system-provided xkbcommon ...... no
Qt Widgets:
  GTK+ ................................... no
  Styles ................................. Fusion Windows

We will rely on EGLFS and EGL on X11 so make sure these are enabled. Having the other X11-related features enabled will not hurt either, a fully functional xcb platform plugin can come handy later on.

Now build Qt and install into $HOME/tx1/qt5. This is the directory we will sync to the device later under /usr/local/qt5 (which has to match -prefix). The host tools (i.e. the x86-64 builds of qmake, moc, etc.) are installed into $HOME/tx1/qt5-host. These are the tools we are going to use to build applications and other Qt modules.

make -j8
make install

On the device, create /usr/local/qt5:

mkdir /usr/local/qt5
sudo chown ubuntu:ubuntu qt5

Now synchronize:

rsync -e ssh -avz qt5 ubuntu@10.9.70.50:/usr/local

Building Applications and other Qt Modules

To build applications, use the host tools installed to $HOME/tx1/qt5-host. For example, go to qtbase/examples/opengl/qopenglwidget and run $HOME/tx1/qt5-host/bin/qmake, followed by make. The resulting aarch64 binary can now be deployed to the device, via scp for instance: scp qopenglwidget ubuntu@10.9.70.52:/home/ubuntu

The process is same for additional Qt modules. For example, to get Qt Quick up and running, check out qtdeclarative (git clone git://code.qt.io/qt/qtdeclarative.git -b dev) and do qmake && make -j8 && make install. Then rsync $HOME/tx1/qt5 like we did earlier. Repeat the same for qtgraphicaleffects, this will be needed by the Cinematic Experience demo later on.

Running Applications

We are almost ready to launch an application manually on the device, to verify that the Qt build is functional. There is one last roadblock when using an example from the Qt source tree (like qopenglwidget): these binaries will not have rpath set and there is a Qt 5.5.1 installation on the device, right there in /usr/lib/aarch64-linux-gnu. By running ldd on our application (qopenglwidget) it becomes obvious that it would pick that Qt version up by default. There are two options: the easy, temporary solution is to set LD_LIBRARY_PATH to /usr/local/qt5/lib. The other one is to make sure no Qt-dependent processes are running, and then wipe the system Qt. Let’s choose the former, though, since the issue will not be present for any ordinary application as those will have rpath pointing to /usr/local/qt5/lib.

The default platform plugin is eglfs, with the eglfs_x11 backend, which does not do more than opening a fullscreen window. This is good enough for most purposes, and also eliminates one common source of confusion: the lack of vsync for non-fullscreen windows. In the default X11-based system there is apparently no vertical synchronization for OpenGL content, unless the window is fullscreen. This is the same behavior like with the Jetson TK1. Running the qopenglwidget example in a regular window will result in an unthrottled rendering rate of 500-600 FPS. Changing to showFullScreen() triggers the expected behavior, the application gets throttled to 60 FPS. Qt Quick is problematic in particular, because the default and best, threaded render loop will result in bad animation timing if vsync-based throttling is not active. This could be worked around by switching to the less smooth basic render loop, but the good news is that with eglfs the problem will not exist in the first place.

Input is handled via evdev, skipping X11. The device nodes may need additional permissions: sudo chmod a+rwx /dev/input/event* (or set up a udev rule). To debug the input devices on application startup, do export QT_LOGGING_RULES=qt.qpa.input=true. If needed, disable devices (e.g. the mouse, in order to prevent two cursors) from X11 via the xinput tool (xinput list, find the device, find the enabled property with xinput list-props, then change it to 0 via xinput set-prop).

And the end result:

qopenglwidget_tx1
qopenglwidget, a mixed QWidget + QPainter via OpenGL + custom OpenGL application

cinematic_tx1
The Qt 5 Cinematic Experience demo (sources available on GitHub) for Qt Quick, with fully functional touch input

Qt Creator

Building and deploying applications manually from the terminal is nice, but not always the most productive approach. What about Qt Creator?

Let’s open Qt Creator 4.1 and the Build & Run page in Options. At minimum, we have to teach Creator where our cross-compiler and Qt build can be found, and associate these with a kit.

Go to Compilers, hit Add, choose GCC. Change the Name to something more descriptive. The Compiler path is the g++ executable in our Linaro toolchain. Leave ABI unchanged. Hit Apply.

tx1_creator1

Now go to Qt Versions, hit Add. Select qmake from qt5-host/bin. Hit Apply.

tx1_creator2

Go to Kits, hit Add. Change the Name. Change the Device type to Generic Linux Device. Change Sysroot to Linux_for_Tegra/rootfs. Change the Compiler to the new GCC entry we just created. Change Qt version to the Qt Versions entry we just created. Hit Apply.

tx1_creator3

That is the basic setup. If gdb is wanted, it has to be set up under Debuggers and Kits, similarly to the Compiler.

Now go to the Devices page in Options. Hit Add. Choose Generic Linux Device and start the wizard. Enter the IP address and ubuntu/ubuntu as username and password. Hit Next and Finish. The testing should succeed. There is no need to associate this Device with the Kit if there is only one Generic Linux Device, but it may become necessary once there are multiple devices configured.

tx1_creator4

Building and Deploying from Qt Creator

Let’s check out the Cinematic Experience demo sources: git clone https://github.com/alpqr/qt5-cinematic-experience.git. In the Configure Project page, select only the kit just created. The configuration is Release since our Qt build was release only. Hit Configure Project. When creating a new project, the approach is the same: make sure the correct kit is selected.

Build the project. Creator will now correctly pick up the cross-compilation toolchain. The result is an ARM binary on our host PC. Let’s deploy and run it.

Choose Deploy. This will likely fail, watch the output in the Compile Output tab (Alt+4). This is because the installation settings are not yet specified in the .pro file. Check this under Run settings on the Projects page. The list in “Files to deploy” is likely empty. To fix this, edit qt5-cinematic-experience.pro and add the following lines at the end:

target.path = /home/ubuntu/qt/$$TARGET
INSTALLS += target

After this, our deployment settings will look a lot better:
tx1_creator7

Choose Run (or just hit Ctrl+R). Creator now uploads the application binary to the device and launches the application remotely. If necessary, the process can also be killed remotely by hitting the Stop button.

tx1_remote
The host and the target

This means that from now on, when doing further changes or developing new applications, the changes can be tested on the device right away, with just a single click.

What’s Next

That’s all for now. There are other interesting areas, multimedia (accelerated video, camera), CUDA, and Vulkan in particular, which unfortunately do not fit in this single post but may get explored in the future. Another future topic is Yocto support and possibly a reference image in the Qt for Device Creation offering. Let us know what you think.

The post Qt on the NVIDIA Jetson TX1 – Device Creation Style appeared first on Qt Blog.

Viewing all 111 articles
Browse latest View live